

You bought a pack of pre-rolled cones because rolling papers by hand never worked out. Then you packed your first cone, lit it up, and watched one side burn faster than the other. That uneven burn, the harsh hot spots, the ash falling apart mid-session, all of it comes down to technique, not the cone itself. Learning how to pack a cone correctly is the difference between a smooth session and wasted herb.
This guide gives you the exact method for packing a cone properly, from grinding your material to the right consistency to using a packing tool that distributes it evenly from tip to base. No guesswork, no wasted product, just a repeatable process that gets you a slow, even burn every single time you fill one.
We'll walk through each step in order: grinding, loading, packing density, and sealing the twist, plus the common mistakes that cause canoeing and runs. We built these cones to burn clean and slow thanks to the acacia gum line, but even the best cone needs proper filling technique to perform. Follow this and you'll never waste a cone on a bad pack again.
What you'll need before you start packing
Getting a clean burn starts before you ever touch the cone. Gathering the right tools upfront saves you from stopping halfway through a pack because you forgot a stuffing tool or your grinder is dull. You don't need a huge setup, just a few reliable pieces of gear that work together.
The essential supply list
Here's what you should have on hand before you start:
- RAW pre-rolled cones in the size you prefer (1 1/4, King Size, Dogwalker Mini, or Lean) — see the cone length, capacity and burn time breakdown if you're unsure
- A sharp grinder, ideally a multi-chamber one with a kief catcher (here are the top grinder picks for every budget)
- A packing tool or stuffing stick (a chopstick or pencil works if you're in a pinch)
- A small tray or flat surface to keep loose material contained
- Your ground cannabis, ready and ideally slightly dried out if it's on the sticky side
Grab all of this before you start, because switching between the fridge, a drawer, and your stash jar mid-pack almost always leads to spilled herb and an uneven fill.
Why cone quality matters more than people think
Quality control on the cone itself matters just as much as your technique. A cheap cone with an uneven paper thickness or a chemical seal will burn unevenly no matter how well you pack it. Green Blazer's RAW pre-rolled cones use an acacia sap gum line instead of synthetic adhesive, which keeps the burn rate consistent along the seam instead of flaring up where the glue sits. If you're using a cheaper brand of cone with a visible glue line or paper that feels stiff and uneven, you're fighting an uphill battle before you even load your first pinch, and there are other signs you're smoking low-quality pre-rolled cones worth knowing.
A good pack can't fix a bad cone, and a bad pack will waste even the best one.
Once your tools and cone are sorted, take a second to check the paper isn't torn near the tip. A small rip there will cause a run no matter how carefully you fill it. If everything checks out, you're ready to grind.
Step 1. Grind your cannabis to the right texture
Grinding sets the foundation for everything else. Consistent grind size is what lets air move evenly through the cone, and that even airflow is what actually produces a slow, even burn instead of one side torching faster than the other. Too fine, and you choke the airflow, causing harsh hits and a burn that won't stay lit. Too coarse, and you get pockets of air that burn hot and fast, leaving unburned clumps behind.
Getting the texture right
Aim for a texture similar to coarse sea salt. You want small, uniform pieces, not powder and not chunks. A multi-chamber grinder does this job better than scissors or your fingers because the mesh screen filters out the pieces that are too fine, so you're not stuffing dust into your cone by accident, and using a weed grinder step by step takes about thirty seconds to learn.
Even grind size is what actually determines even burn, not the cone.
Checking your work before you load
Spread your ground material out on your tray and look it over. You're checking for a few things:
- No large stems or seeds left in the mix
- No compressed clumps stuck together
- A texture that falls easily through your fingers without sticking, the kind you get from the right grinder settings for filling cones without overpacking
If your material feels sticky or damp, let it sit out for ten to fifteen minutes before grinding again. Wet material clogs your grinder and packs unevenly no matter how careful you are, so it's worth knowing the ideal moisture level for flower before filling a cone. Dry, evenly ground material is what makes the next step, filling the cone, go smoothly instead of turning into a frustrating mess of clumps and gaps.
Step 2. Fill the cone in even layers
Now that your material is ground and ready, resist the urge to dump it all in at once. Layering your fill in small amounts is what keeps the density consistent from the tip all the way to the base, and that consistency is exactly what stops one section from burning faster than the rest. Dumping a big pinch in at once creates air pockets near the bottom and a compressed clump near the top, which is a recipe for canoeing on one side, especially with sticky weed where preventing canoeing takes a few extra precautions.
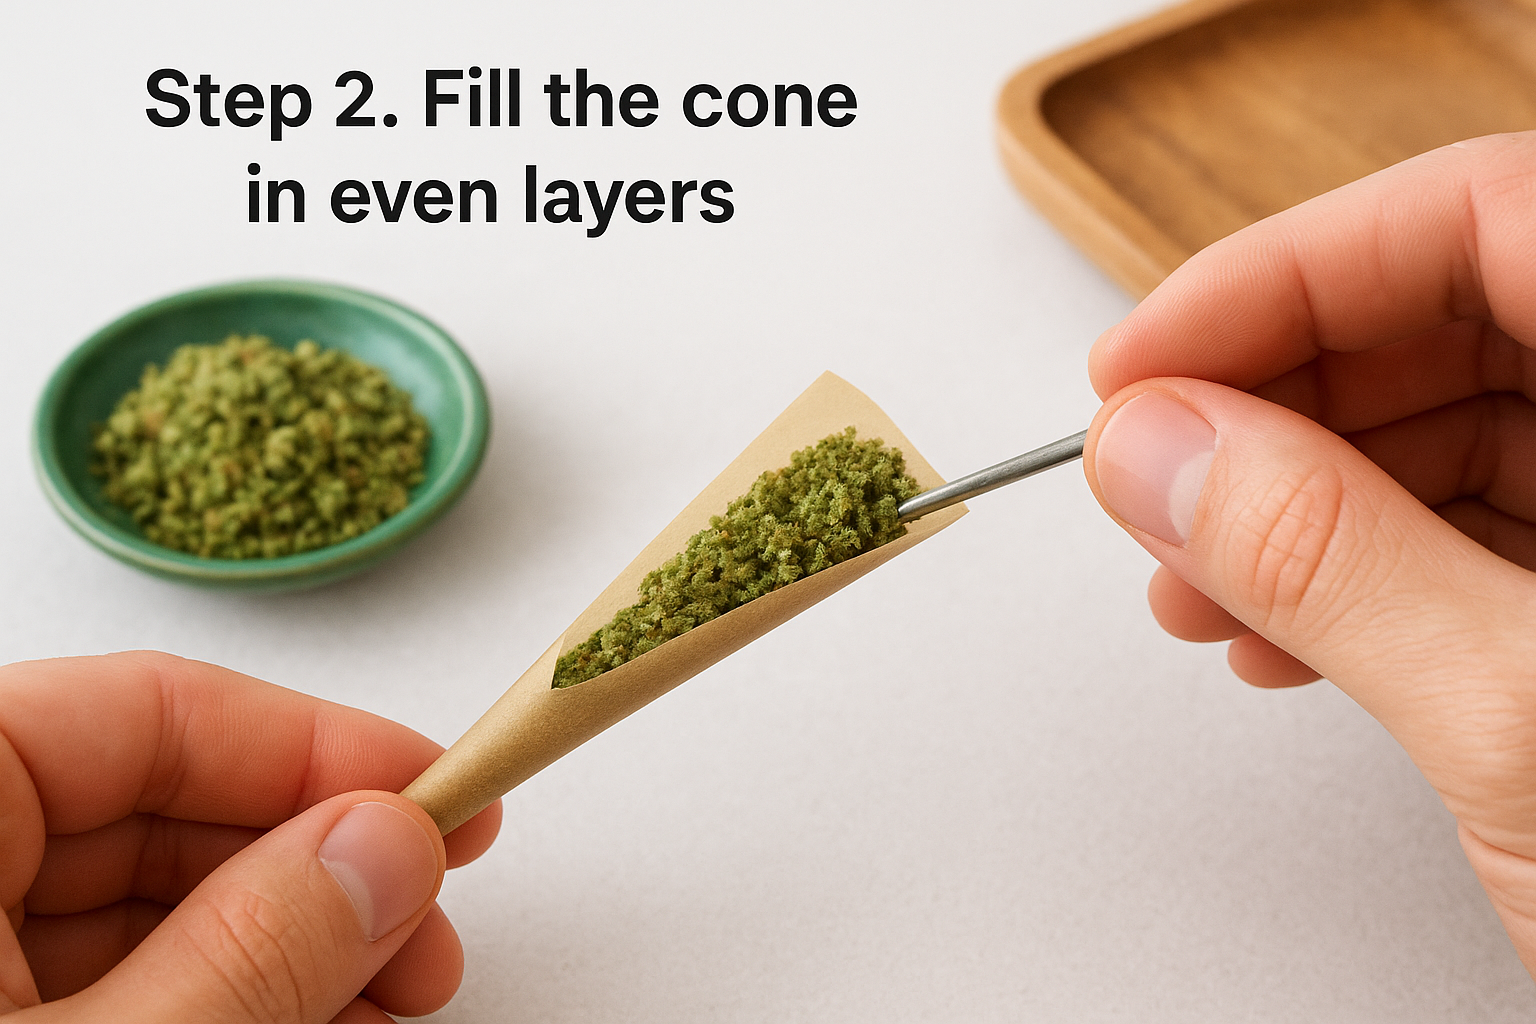
Working in small pinches
Grab a small pinch of your ground material, about the size you'd use to top off a bowl, and drop it into the open end of the cone. Tap the base gently against your tray after each pinch so the material settles toward the tip instead of piling up loosely near the opening. Repeat this in three or four rounds rather than two big ones. Working in layers this way is slower, but it's the step people skip most often, and skipping it is why so many packed cones burn crooked.
Small layers beat one big dump every time you fill a cone.
Watching the tip fill first
Pay close attention to the tip of the cone during your first pinch or two. This narrow end fills fastest and clogs easiest, so use your packing tool to gently guide material down before it bridges and leaves an air gap. An air gap at the tip is one of the most common causes of a run, where the cherry burns straight down one side instead of staying level. Once the tip is loaded evenly, keep building layers toward the wider base until the cone is full but not overstuffed.
Step 3. Pack and tap for consistent density
Once your cone is loaded from tip to base, the packing stage is what locks everything into place. Even density throughout the cone means air pulls through at the same rate everywhere, which is the whole point of this exercise. A cone that's loose at the bottom and tight at the top will burn fast where it's loose and choke where it's tight, giving you the same uneven burn you were trying to avoid, which is exactly how packing density shapes burn quality.
Using your packing tool correctly
Take your packing tool, whether it's a dedicated stuffing stick or a chopstick, and press down gently in short strokes rather than one long shove. Work from the tip toward the base, applying light pressure each time. You're aiming for firm but springy resistance, not a rock-hard plug. If your tool sinks in without any pushback, your cone density is too loose. If it barely moves, you've packed it too tight and airflow will suffer.
Firm but springy is the density you want, not packed solid.
Tapping between rounds
After each round of packing, tap the base of the cone against your tray a few times. This settles any remaining gaps without you having to force material down by hand. Add a small amount more material if the level has dropped, then pack again. Repeat this pack-and-tap cycle two or three times until the cone feels evenly firm from the tip to the opening, with no soft spots or dense clumps anywhere along the length.
Step 4. Twist and seal your cone
With your cone packed to an even density, the last step is closing it up so nothing spills and the burn stays contained. Twisting the tip locks your material in place and gives you a clean point to light, while a sloppy twist leaves loose paper that burns unevenly or falls apart in your fingers after a few hits.
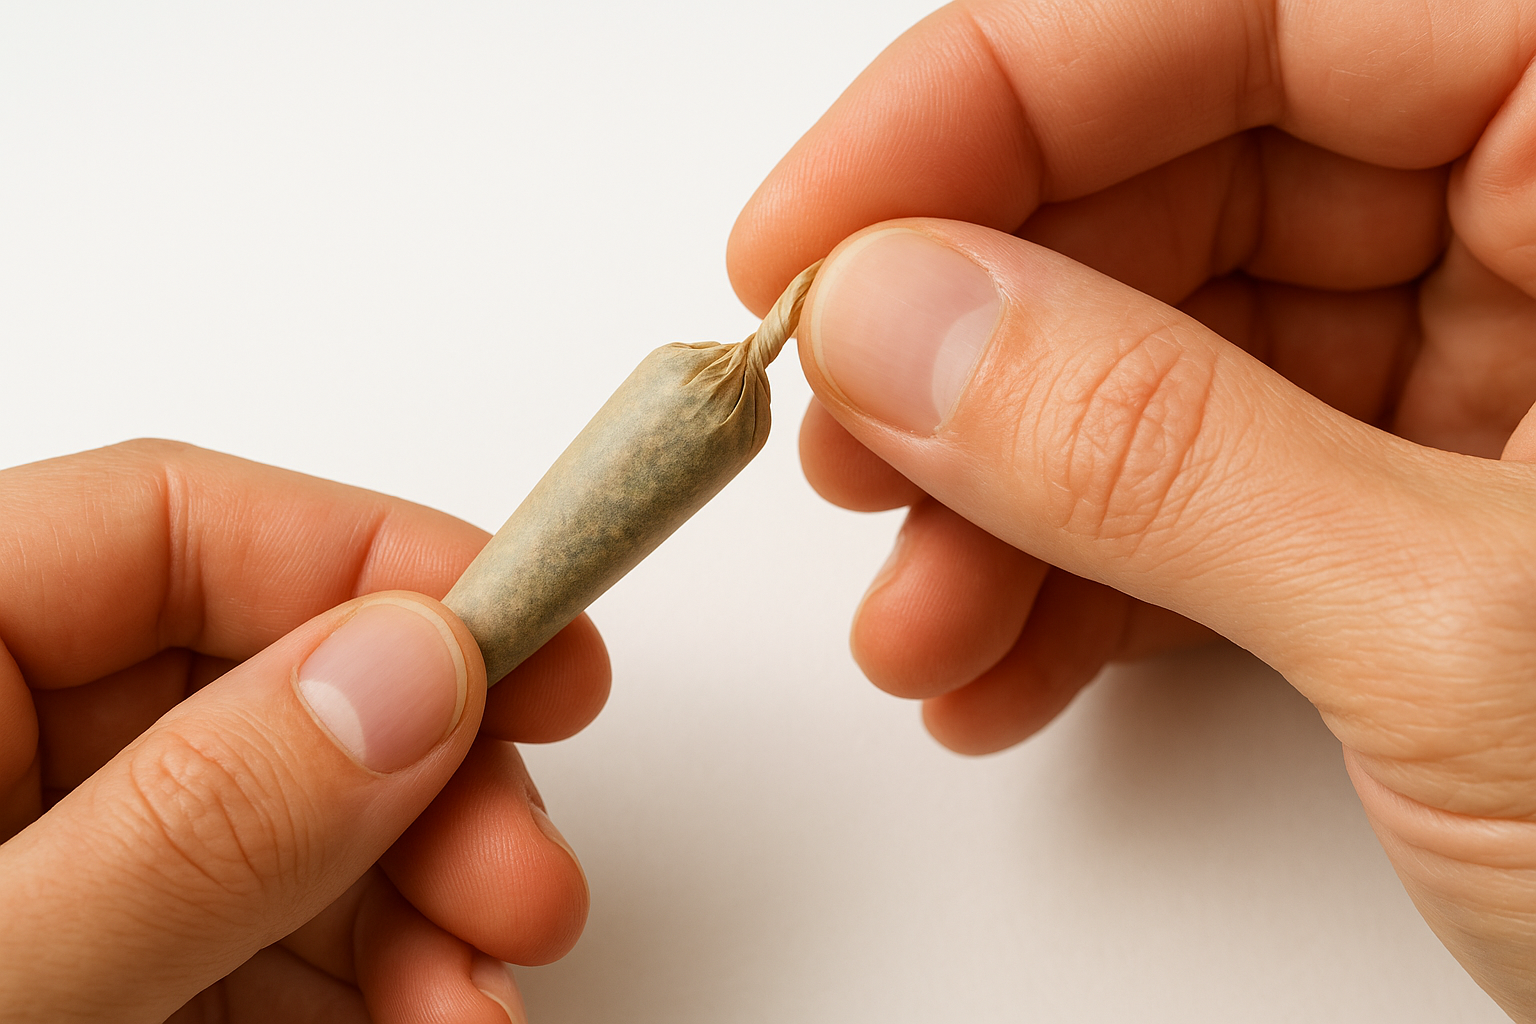
Twisting the open end
Pinch the open end of the cone between your thumb and forefinger, then roll it in one direction until the paper forms a tight little tail. You're not folding it over, you're spinning it closed like sealing a bag of chips. A good twist should hold on its own without tape or extra effort. If it unwinds when you let go, you twisted too loosely, so try again with a bit more pressure.
A tight twist keeps your pack sealed and your burn contained from the first hit to the last.
Checking the final seal
Before you light up, run your fingers along the length of the cone one more time. Feel for any soft spots or gaps you might have missed during packing.
- No loose material shifting when you tilt the cone
- No visible air pockets near the seam
- A twist that stays closed without unraveling
If everything checks out, you've got a properly packed cone ready for a slow, even burn. This is the same standard we hold every RAW cone to before it leaves our warehouse.
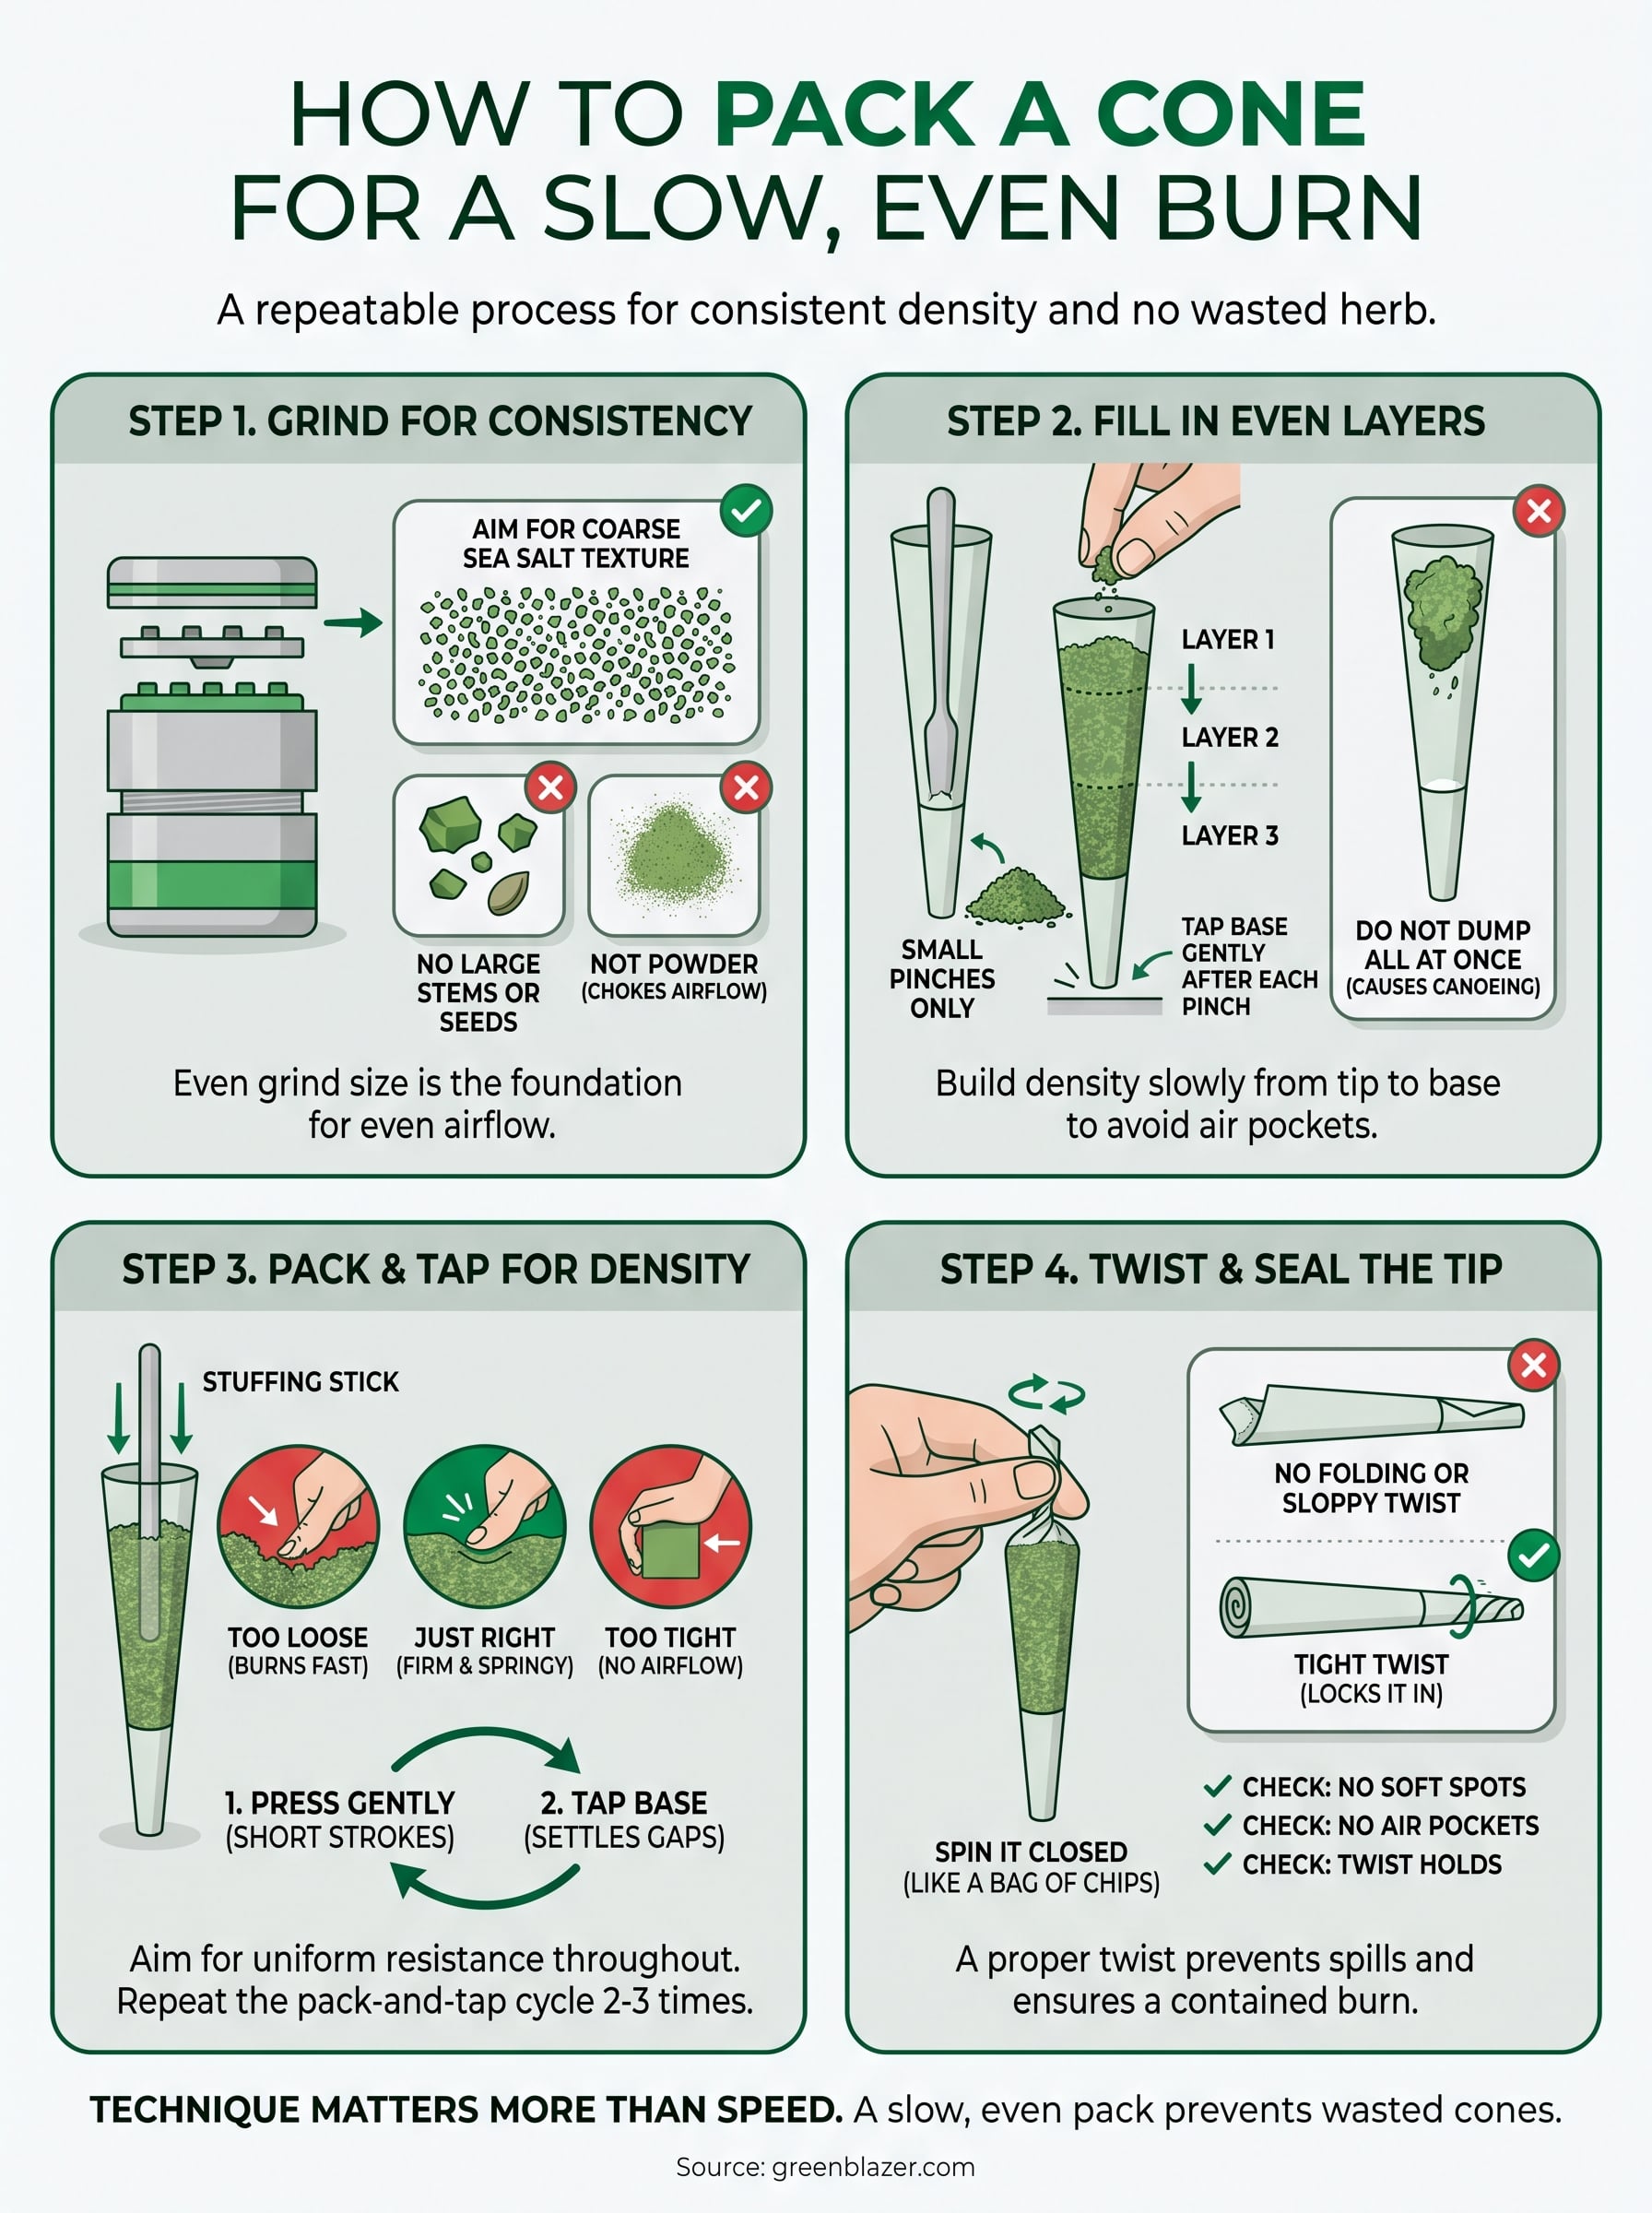
A few final tips for a smoother pack
Getting comfortable with how to pack a cone takes a few tries, so don't expect your first attempt to be perfect. Keep your material dry, work in small layers, and don't rush the twist at the end. Those three habits fix almost every burn problem you'll ever run into.
Remember that technique matters more than speed. A cone packed slowly and evenly will always outperform one you rushed to finish. Give yourself the extra ninety seconds, tap between layers, and check your density before you seal it up. That's the whole method, and it works the same way every single time you pick up a cone.
None of this matters if the cone itself is cutting corners on paper or glue. Grab a pack of RAW King Size pre rolled cones from Green Blazer and put this technique to work on a cone built to actually hold it.
