
A one hitter is one of the most portable, discreet ways to smoke, until resin builds up and turns every hit into a harsh, clogged mess. If you're searching for how to clean a one hitter pipe, you're probably already at that point where airflow is restricted and the taste has gone downhill fast. The good news: a few household supplies and ten minutes are all you need to get it back to near-new condition.
Below, we'll walk you through multiple cleaning methods, isopropyl alcohol and salt, vinegar and baking soda, boiling water, and a few other tricks, so you can pick the approach that works with whatever you have on hand. We'll also cover how often to clean, common mistakes to avoid, and tips for keeping your pipe cleaner between sessions.
At Green Blazer, we're known as the largest authorized RAW cone retailer in the U.S., and plenty of our customers use one hitters alongside their pre-rolled cones. One of the reasons people love RAW cones is the zero-maintenance convenience, no resin buildup, no scraping, no soaking. But when you do reach for your one hitter, keeping it clean makes all the difference in flavor and function. Here's exactly how to do it.
What you need and what to avoid
Gathering your supplies before you start saves time and prevents you from abandoning the job halfway through. Most of what you need is already in your home, and none of it requires a specialty pipe-cleaning kit or expensive products. Knowing what to keep away from your pipe is just as important as knowing what to use, because the wrong cleaner can leave behind residue you'll end up inhaling.
The right supplies
Before you tackle how to clean a one hitter pipe, stock up on a short list of items. Isopropyl alcohol at 91% or 99% concentration works far better than the standard 70% you'll find in most medicine cabinets; the higher the alcohol percentage, the faster it dissolves stubborn resin. Coarse salt, like sea salt or kosher salt, acts as a mild abrasive that scrubs the interior walls while the alcohol does the chemical work.
Higher-concentration isopropyl alcohol (91%+) dissolves resin significantly faster than 70%, cutting your soak time roughly in half.
Here's a full supply list to cover both the alcohol method and the non-alcohol alternatives in this guide:
| Method | What you need |
|---|---|
| Alcohol + salt | 91%+ isopropyl alcohol, coarse salt, resealable zip bag, pipe cleaners or cotton swabs, warm water |
| Vinegar + baking soda | White vinegar, baking soda, warm water, small container, pipe cleaners |
| Boiling water | Small pot, tongs or heat-proof gloves, pipe cleaners |
| General use | Paper towels, wooden toothpicks, a small soft brush (optional) |
Pipe cleaners or thin cotton swabs are worth having on hand regardless of which method you choose. They let you physically scrub the narrow bore of the pipe after soaking, which is where most residual buildup hides even after a thorough soak.
What to avoid
A few common cleaning choices can permanently damage your pipe or leave behind residue that affects your next session. Bleach and harsh chemical cleaners should never touch your pipe; they're difficult to fully rinse from a narrow tube, and any trace left behind becomes something you inhale directly. Dish soap is tempting because it's always nearby, but it leaves a soapy film that clings to the interior and requires multiple rinses to fully clear out, especially inside a tight one hitter bore.
Avoid using boiling water on glass pipes if your pipe has any existing micro-cracks or thin spots. The rapid temperature change can cause the glass to shatter. If you plan to use the boiling method on a glass one hitter, always start with warm water and raise the temperature gradually rather than dropping a cold pipe into a rolling boil.
Metal scrapers and sharp tools are another thing to leave in the drawer. It's tempting to use a knife or metal pick to dig out resin, but you risk scratching the interior of a glass pipe or gouging the barrel of a metal one. Scratches create rough surfaces where resin grips more aggressively, which means faster buildup and harder cleanings down the road. Stick to wooden toothpicks for any mechanical clearing, and let your soaking solution handle the bulk of the work. The goal is to loosen and dissolve, not to scrape.
Step 1. Empty, loosen resin, and clear clogs
Before you introduce any cleaning solution, remove loose material and loosen the hardened resin coating the interior walls. Skipping this prep work forces your soak to work harder than necessary, and a solid plug of compressed ash or resin won't dissolve with alcohol alone, no matter how long you leave the pipe submerged.
Tap out ash and debris
Hold your one hitter upside down over a trash can or paper towel and tap the mouthpiece end firmly against your palm. Most loose ash and dry material drops out in a few firm taps. If the bowl end has a screen, pull it out first and set it aside for separate cleaning so it doesn't block the cleaning solution from reaching the pipe interior.
Use a wooden toothpick at the bowl opening to clear any packed debris. Work it around the inner rim in small circles rather than poking straight down. Pushing directly down drives material deeper into the bore and turns a minor clog into a full blockage.
Warm the pipe to release resin
Gentle heat makes resin significantly softer and easier to pull out before you start soaking. Hold the bowl end of a metal or glass one hitter a few inches above a lighter flame for three to five seconds, keeping the flame moving so you don't overheat one spot. The resin inside will soften and start to loosen from the walls.
Never hold a flame still on one spot or apply heat to a cracked glass pipe; uneven heat causes stress fractures that can split the pipe entirely.
Once the pipe cools for about thirty seconds, push a pipe cleaner or thin cotton swab through the bore to pull out the softened resin. You'll often remove a surprising amount in this single step. Here's a quick checklist of what to finish before moving on to the deep clean:
- Tap out all loose ash and dry debris
- Remove any screens for separate cleaning
- Clear the bowl rim with a wooden toothpick
- Apply brief, gentle heat to the bowl end
- Push a pipe cleaner through the bore to extract softened resin
Completing these steps sets up your pipe so the alcohol soak in Step 2 works on residue film rather than fighting through packed material. This prep is what most guides on how to clean a one hitter pipe skip, and it's the reason some cleanings take ten minutes while others drag on and still leave buildup behind.
Step 2. Deep clean with isopropyl alcohol and salt
The isopropyl alcohol and salt method is the most effective way to clean a one hitter pipe, and it works on glass, metal, and acrylic. Alcohol dissolves the sticky resin film that coats the interior walls, while the coarse salt acts as a scrubbing agent that knocks loose anything the alcohol softens. Combined, they handle the deep clean without requiring you to physically force a brush through the entire bore.
Soak the pipe in the solution
Place your prepped pipe from Step 1 into a resealable zip bag large enough to submerge it completely. Pour in enough 91% or higher isopropyl alcohol to cover the pipe by at least a half inch, then add a generous tablespoon of coarse salt. Seal the bag, leaving a small pocket of air so you can agitate the mixture without it spilling out.
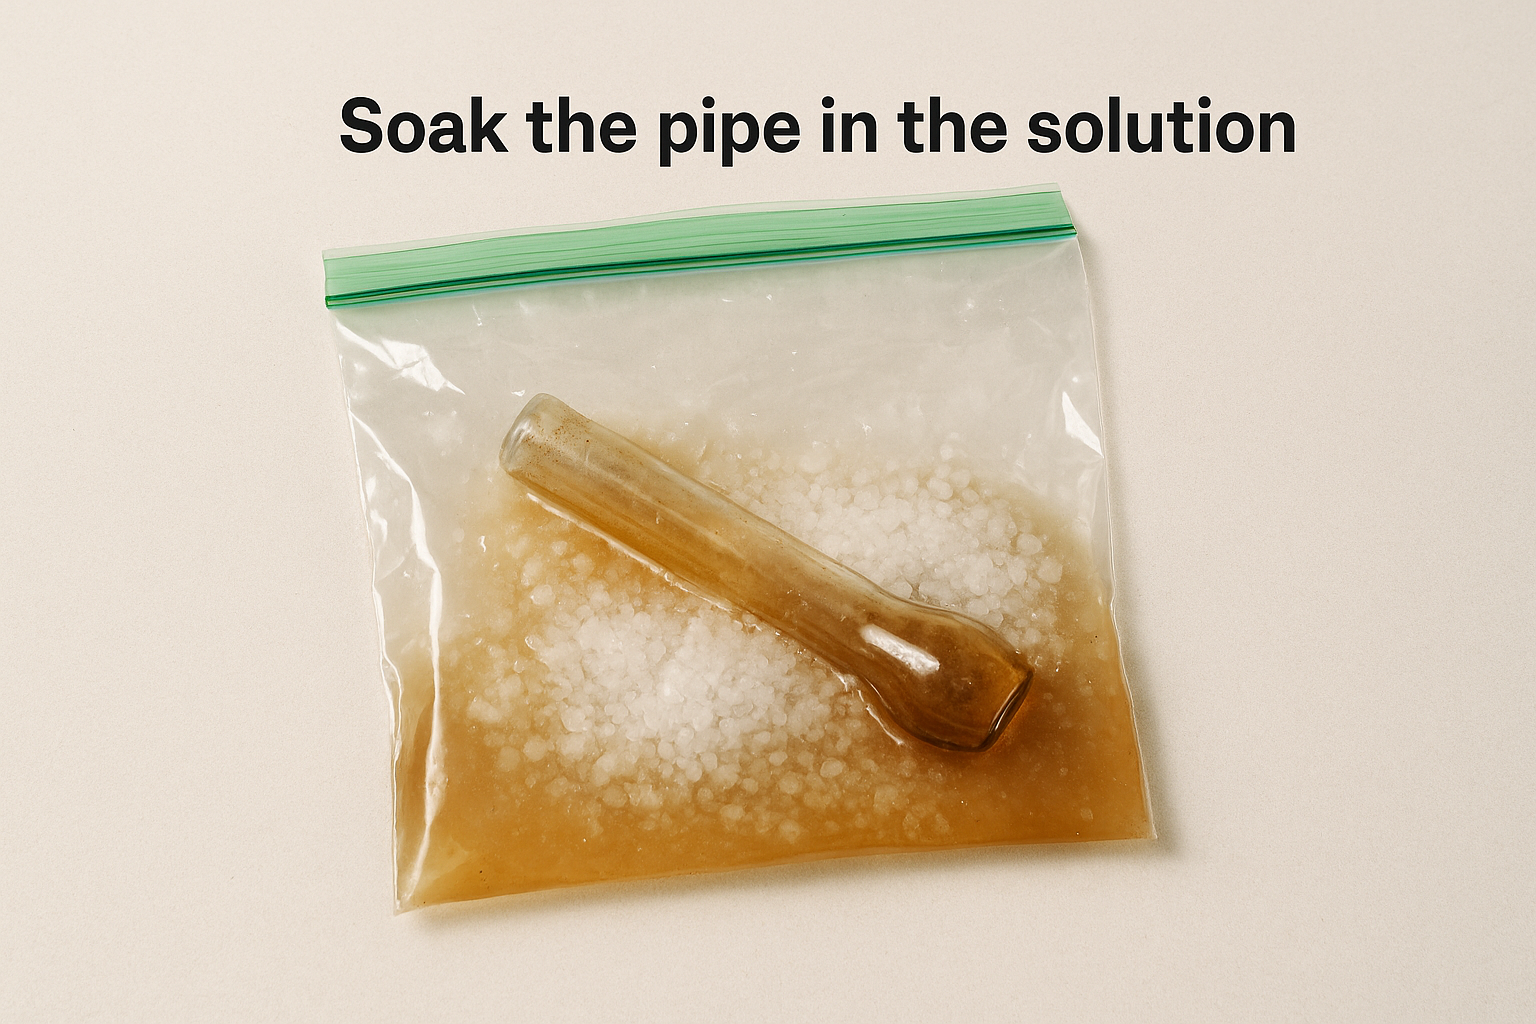
A 15-minute soak handles moderate buildup, but a heavily clogged pipe benefits from 30 to 45 minutes before you start shaking the bag.
Shake the bag firmly for two to three minutes in short, controlled bursts. You'll see the alcohol turn dark brown as it pulls resin off the walls. Let the bag sit flat on a surface for the remainder of your soak time so the salt settles against the pipe and maintains contact with the interior.
Here's a quick reference for soak times based on buildup level:
| Buildup Level | Signs | Recommended Soak Time |
|---|---|---|
| Light | Slightly discolored walls, airflow still decent | 10 to 15 minutes |
| Moderate | Visible resin film, reduced draw | 20 to 30 minutes |
| Heavy | Thick resin, restricted or blocked airflow | 30 to 45 minutes |
Scrub and check the bore
After soaking, remove the pipe from the bag and run a pipe cleaner or thin cotton swab through the bore in a back-and-forth motion. The softened resin should come out on the first or second pass without much force. If resistance remains, return the pipe to a fresh alcohol-and-salt soak for another ten minutes before trying again.
Hold the mouthpiece end up to a light source once you've finished scrubbing. If you can see clean through the bore with no dark patches on the walls, the alcohol step is complete. Move on to the rinse in Step 4, or continue to Step 3 if you need a non-alcohol method instead.
Step 3. Clean without alcohol
If you don't have isopropyl alcohol on hand or prefer to avoid it, two reliable alternatives will still get your pipe clean: vinegar with baking soda, and boiling water. Neither method matches the speed of the alcohol-and-salt approach, but both dissolve resin effectively with enough soak time. Knowing how to clean a one hitter pipe without alcohol also comes in handy when you're traveling or when your alcohol supply runs low between sessions.
Vinegar and baking soda method
White vinegar is mildly acidic and breaks down the organic compounds in cannabis resin given enough contact time. When you add baking soda, the two react and create a fizzing action that helps lift buildup off interior walls. This reaction is not as aggressive as it looks, so don't expect it to clear a heavily clogged pipe in a single short soak. Allow at least 30 to 45 minutes for moderate buildup, and up to an hour for anything heavier.
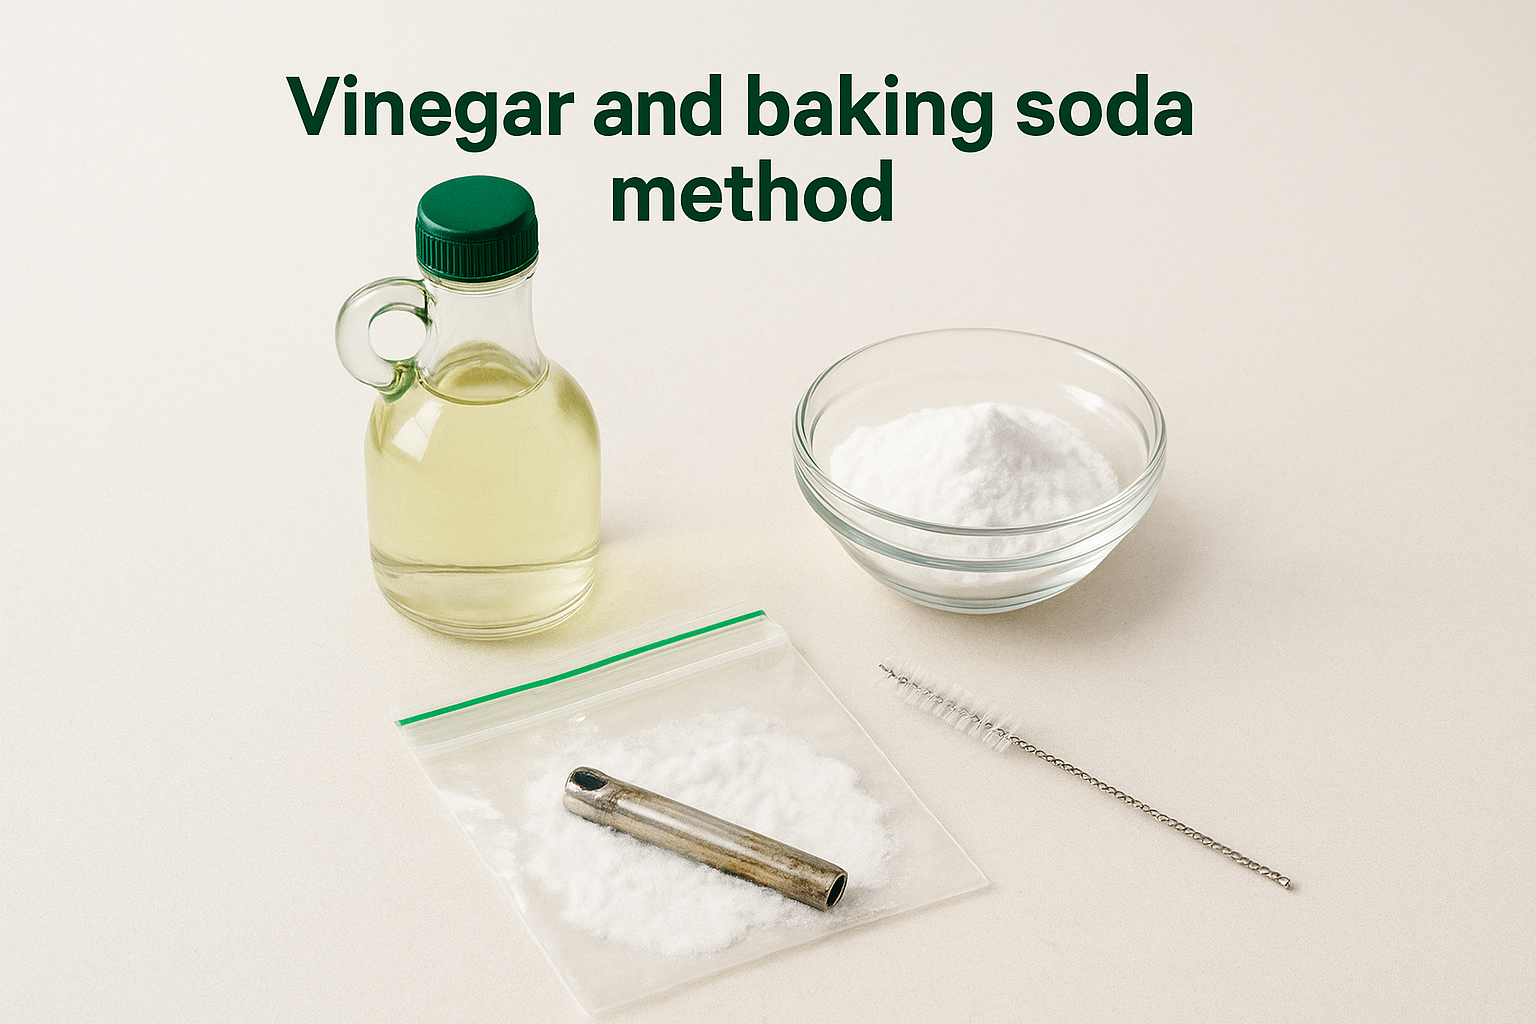
The fizzing reaction from vinegar and baking soda is most effective on fresh or moderate resin; for thick, caked buildup, run the pipe through this method twice before expecting clear airflow.
Follow these steps for the vinegar method:
- Place your prepped pipe in a small container or resealable bag.
- Pour in enough white vinegar to fully submerge the pipe.
- Add one teaspoon of baking soda and watch for the fizzing reaction.
- Let the pipe soak for 30 to 60 minutes based on buildup level.
- Run a pipe cleaner through the bore to remove loosened resin.
- Rinse thoroughly with warm water before moving to Step 4.
Boiling water method
Boiling water works by using sustained heat to liquefy resin so it flows out of the pipe rather than staying stuck to the walls. This method suits metal one hitters better than glass because repeated thermal cycling stresses glass over time. If you use it on a glass pipe, start with warm water in the pot and raise the temperature gradually over a few minutes rather than lowering a cold pipe into a full boil.
Keep the pipe submerged in gently boiling water for seven to ten minutes, then use tongs to remove it safely. Push a pipe cleaner through the bore immediately while the pipe is still warm, since the resin cools and hardens quickly once you pull the pipe from the water.
Step 4. Rinse, dry, and prevent buildup
Rinsing properly matters more than most guides on how to clean a one hitter pipe acknowledge. Any alcohol, vinegar, or baking soda residue left in the bore becomes part of your next hit, and none of those tastes belong in a clean session. This step takes only a few minutes but locks in everything you did in the previous steps.
Rinse until the water runs clear
Hold your pipe under warm running water and flush the bore from both ends, alternating between the mouthpiece and the bowl end. Warm water keeps any remaining loosened resin fluid so it washes out rather than re-sticking to the walls. Run water through the pipe for at least 60 seconds total, then hold it up to a light source and look through the bore. If you see any dark film on the walls or discoloration in the water draining out, push a clean pipe cleaner through one more time and rinse again.
Skipping the light check is the most common reason people think their pipe is clean when thin resin film still coats the interior walls.
Once the water runs completely clear and the bore looks clean, shake out the excess water with a few firm flicks. Set the pipe mouthpiece-end down on a folded paper towel and let it air dry for at least 20 to 30 minutes before your next use. Moisture trapped inside the bore affects your draw and can introduce a stale smell if you store the pipe while it's still damp.
Reduce buildup between deep cleans
Preventing heavy resin accumulation is easier than removing it once it hardens. A quick pipe cleaner pass after every two or three sessions takes less than a minute and removes fresh resin before it bonds to the walls. Fresh resin wipes out with almost no effort; aged resin requires the full soak and scrub process you just completed.
Here are four habits that keep your one hitter cleaner between full deep cleans:
- Run a pipe cleaner through the bore every two to three uses
- Tap out ash immediately after each session rather than letting it pack down
- Store your pipe in a clean, dry case to prevent dust and debris from settling in the bore
- Avoid packing the bowl so tightly that material compresses into the bore on the draw
Final takeaways
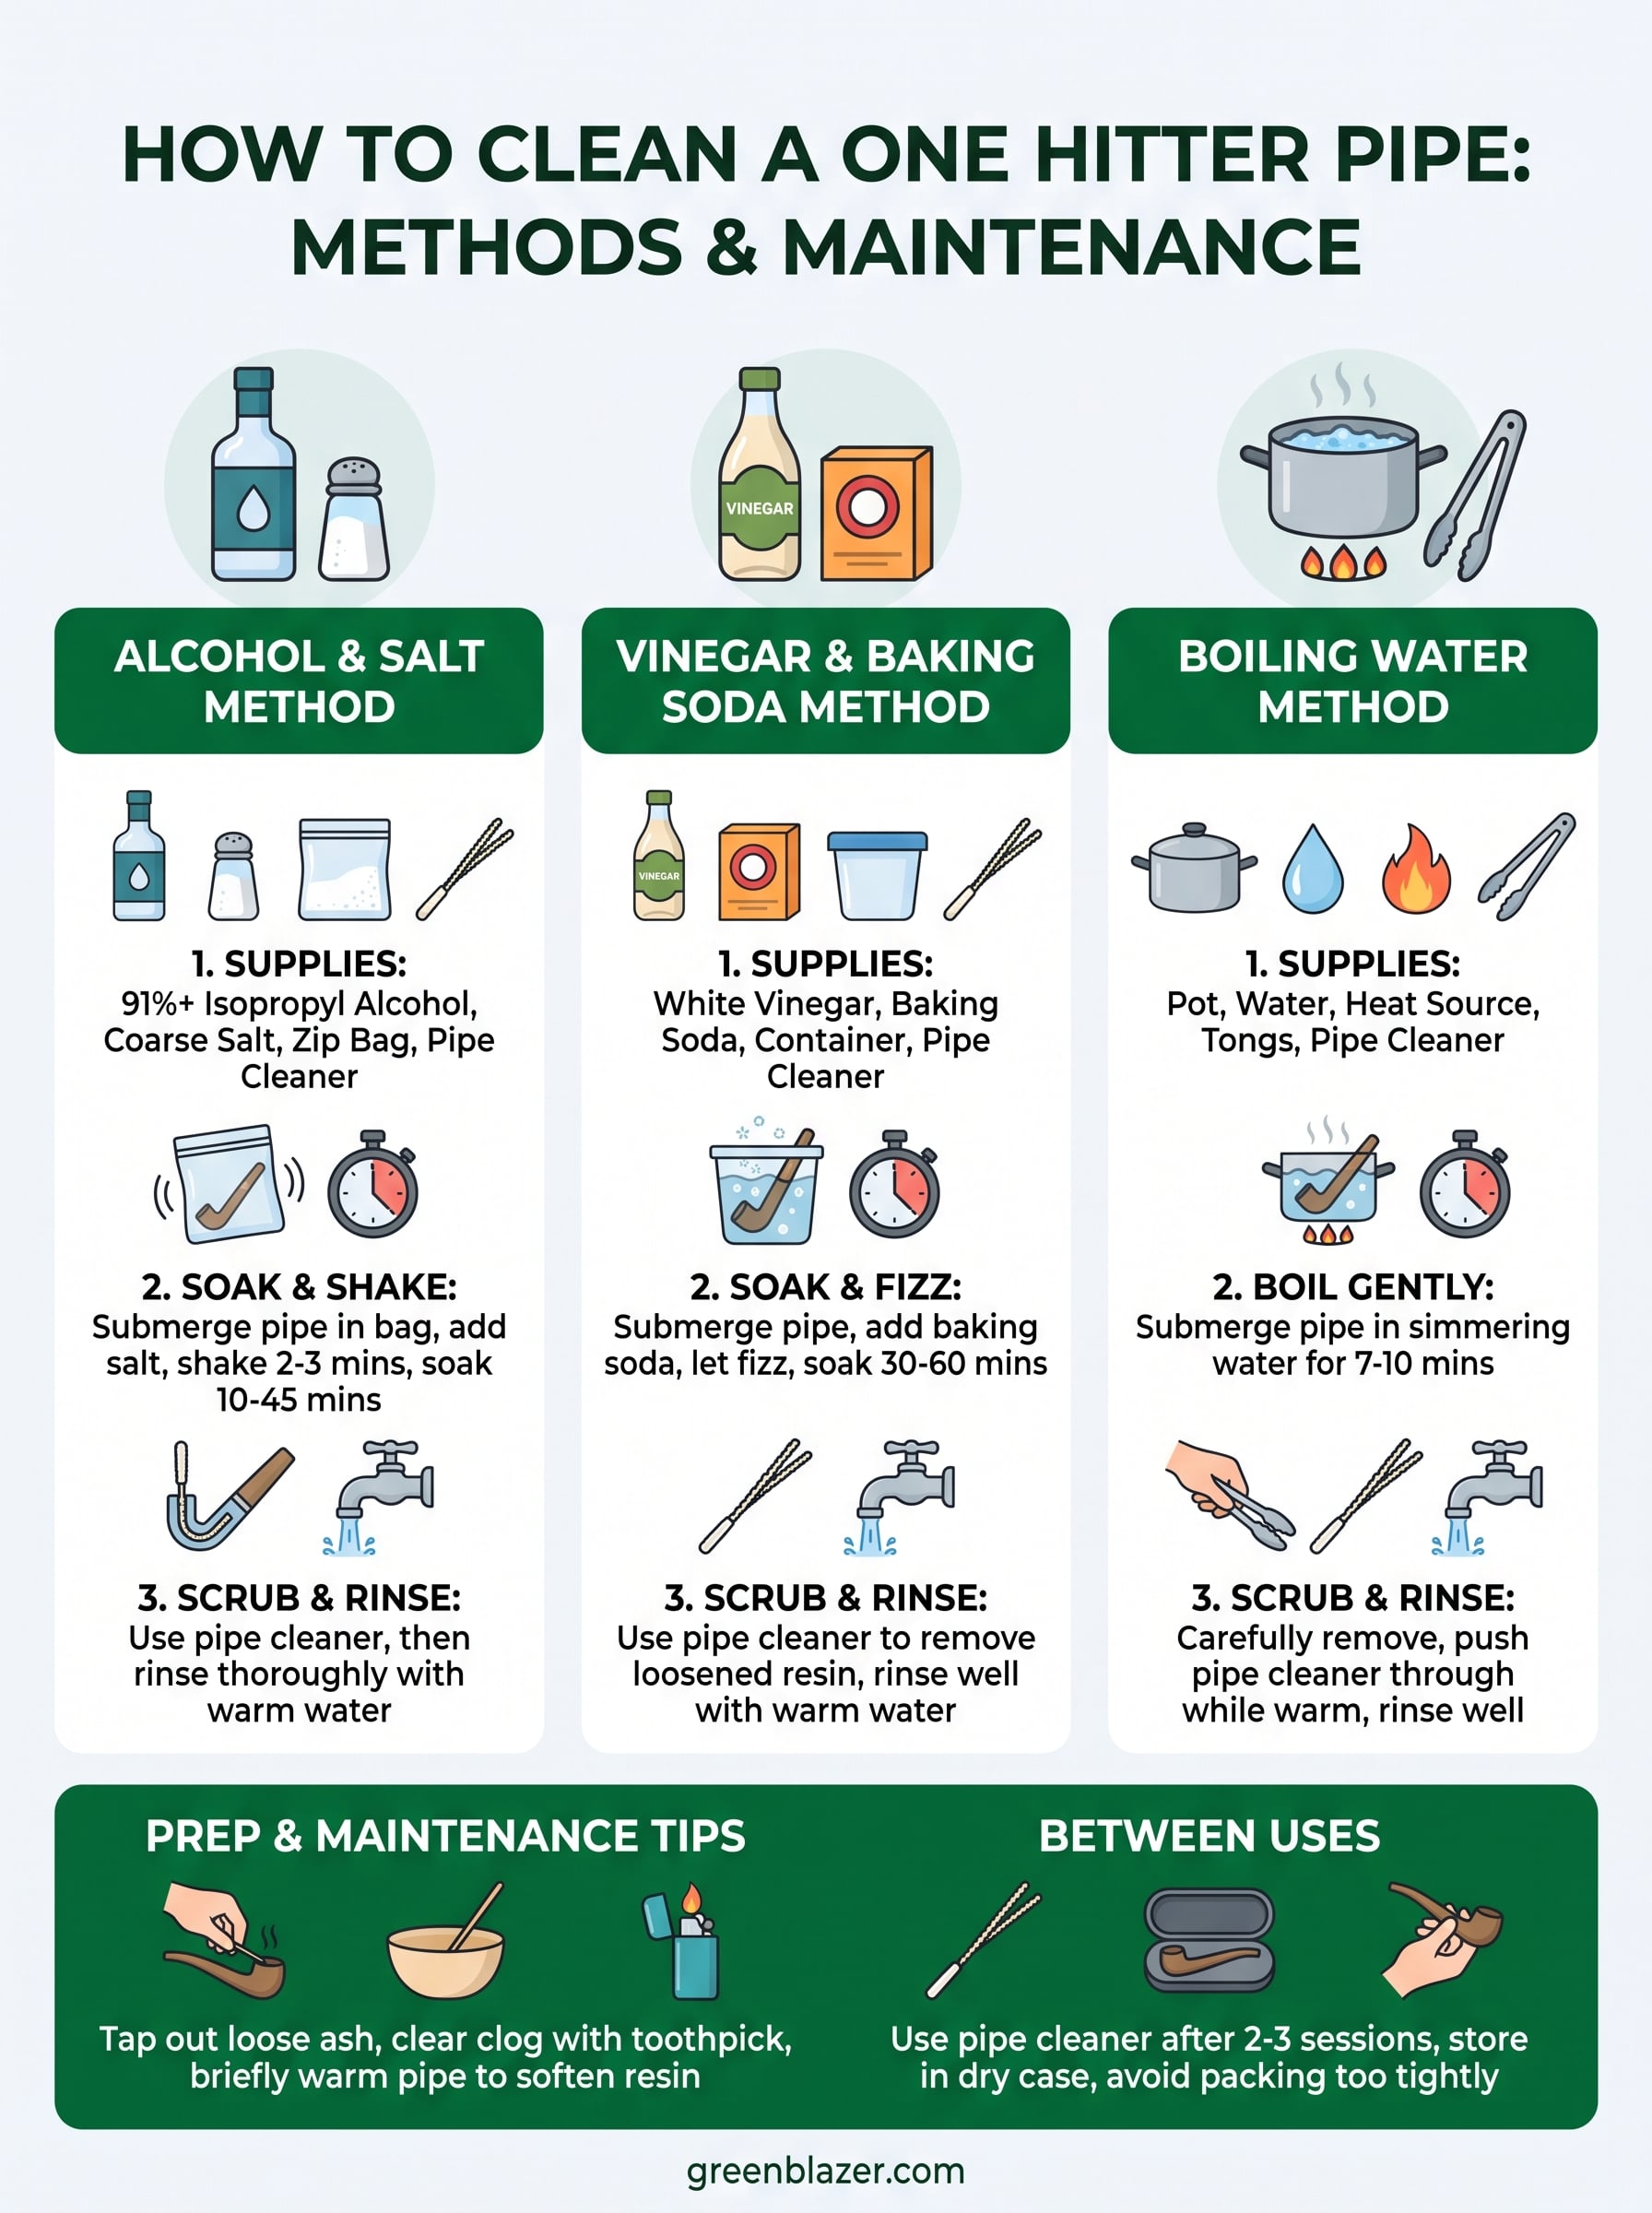
Knowing how to clean a one hitter pipe comes down to three things: the right supplies, the right method for your situation, and building quick habits between deep cleans. Isopropyl alcohol at 91% or higher with coarse salt gives you the fastest and most thorough clean for glass and metal pipes. If you don't have alcohol on hand, vinegar and baking soda or boiling water both work with a longer soak time. The prep work in Step 1 is what separates a ten-minute cleaning from a frustrating hour-long scrub, so never skip it.
Your pipe stays cleaner longer when you run a pipe cleaner through the bore every few uses and tap out ash right after each session. Small habits prevent the thick buildup that requires a full soak. If you want the zero-maintenance alternative to rolling your own, check out the RAW pre-rolled cones available at Green Blazer and skip the cleanup entirely.
