
Learning how to roll a joint is one of those skills that looks effortless when someone else does it, and feels impossible the first time you try it yourself. Loose flower spilling everywhere, a paper that won't cooperate, and a finished product that burns unevenly or falls apart mid-session. It's a frustrating start, but the good news is that rolling a solid joint isn't about natural talent. It's a repeatable technique, and once you understand the mechanics, it clicks fast.
This guide breaks down every step from grinding your flower to sealing the paper, including a simple filter tip trick that improves airflow, structure, and overall smoking quality. Whether you've never touched a rolling paper or you've tried a few times with disappointing results, the techniques here are built for beginners who want to get it right without wasting product.
At Green Blazer, we're the largest authorized RAW cone retailer in the United States, and we spend a lot of time helping people find the easiest path to a great smoke. Pre-rolled cones are our specialty for exactly that reason, they skip the hardest parts of rolling entirely. But we also believe you should know the fundamentals. Understanding how a joint comes together makes you a better smoker whether you roll by hand, use a cone, or switch between both depending on the situation. Let's get into it.
What you need before you start
Before you learn how to roll a joint, you need the right materials laid out in front of you. Trying to roll with the wrong paper or poorly ground flower is the fastest way to end up with a frustrating mess and wasted product. Getting your setup right from the beginning gives you a much better chance of producing something that actually smokes well, even on your very first attempt.
Your materials checklist
Every solid roll starts with the same core items. Missing even one of these can throw the whole process off, so run through this list before you sit down to roll.
| Item | What to look for |
|---|---|
| Cannabis flower | At least 0.5g to start; 1g is a standard single joint |
| Rolling papers | 1 1/4 size is the best starting point for beginners |
| A grinder | Two-piece or four-piece both work fine |
| Filter tip material | A pre-cut filter tip or a small strip of cardstock |
| A pen or thin dowel | For packing the finished joint before you light it |
| A clean, flat surface | Gives you a stable workspace so flower does not scatter |
A grinder is non-negotiable. Flower ground to a consistent, medium-fine texture burns far more evenly than anything you break up by hand, and it fills the paper without creating air pockets.
Choosing the right rolling paper
Paper size and material make a bigger difference than most beginners expect. A 1 1/4 size paper is the standard starting point because it gives you enough surface area to work with while staying manageable in your hands. Thinner papers burn slower and add less paper taste to each pull, which noticeably improves the overall experience once you have the technique down.
Your main material options are wood pulp, rice, and hemp papers. Wood pulp papers have the most grip and hold their shape well during rolling, which is exactly what you want when you are still working out the mechanics. Rice papers burn cleaner but tend to be slippery and harder to handle. Hemp papers fall in the middle and are a solid step up once you have a basic roll dialed in. For your first several attempts, wood pulp or hemp at 1 1/4 size is the right call.
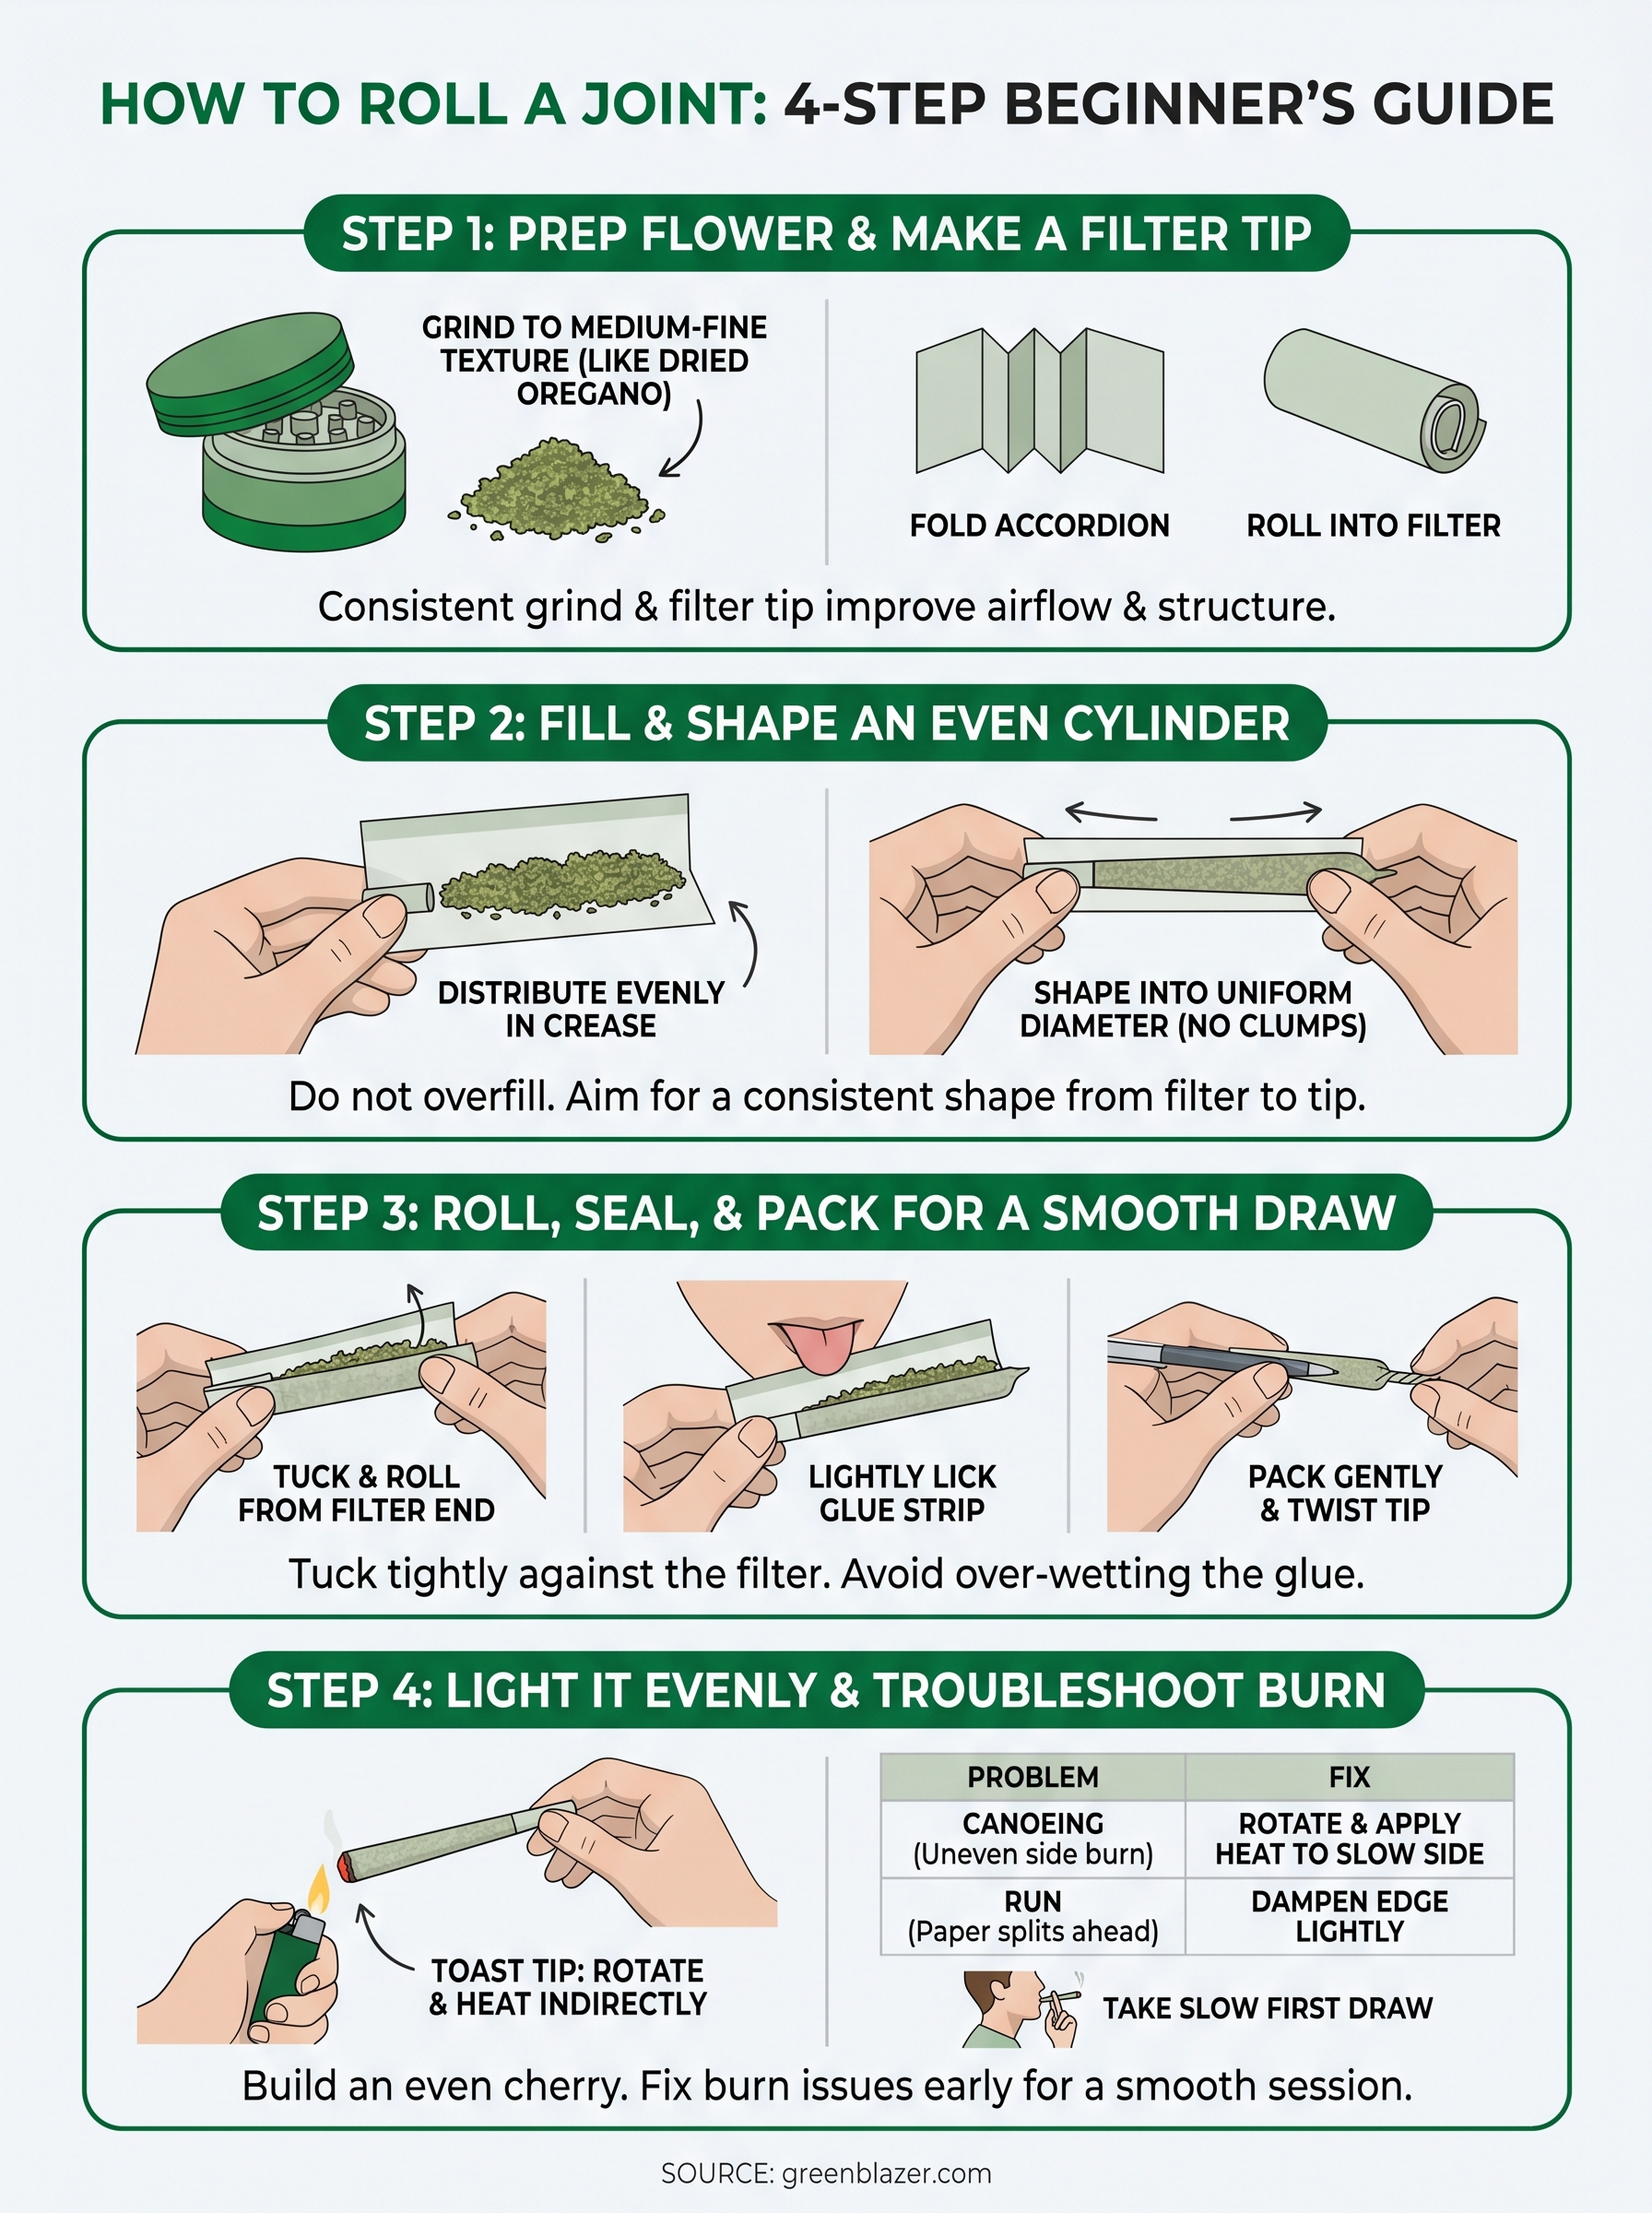
Step 1. Prep your flower and make a filter tip
The first step in learning how to roll a joint is getting your flower and filter ready before the paper ever touches your hands. Skipping this prep is the main reason beginners end up fighting their roll halfway through and wasting product.
Grinding your flower
Load your grinder over a clean surface, then grind your flower to a consistent, medium-fine texture. You want fluffy and uniform, not powdery. Over-grinding causes flower to pack too tight and chokes airflow. Under-grinding leaves chunks that burn unevenly and create hot spots mid-session.
Aim for a texture similar to dried oregano. That is the sweet spot for airflow, burn rate, and ease of rolling.
Medium-fine ground flower also fills the paper without gaps or air pockets, which is what gives your finished joint its structure. If you see clumps or fine dust, adjust your grinding time before moving forward.
Making the filter tip
A filter tip, also called a crutch, is a rolled tube of stiff paper that sits at one end of your joint. It holds the opening open, adds structural support, and stops flower from pulling into your mouth on the draw. Use a pre-cut tip or cut a strip of cardstock about 6mm wide and 4-5cm long, then follow these steps:
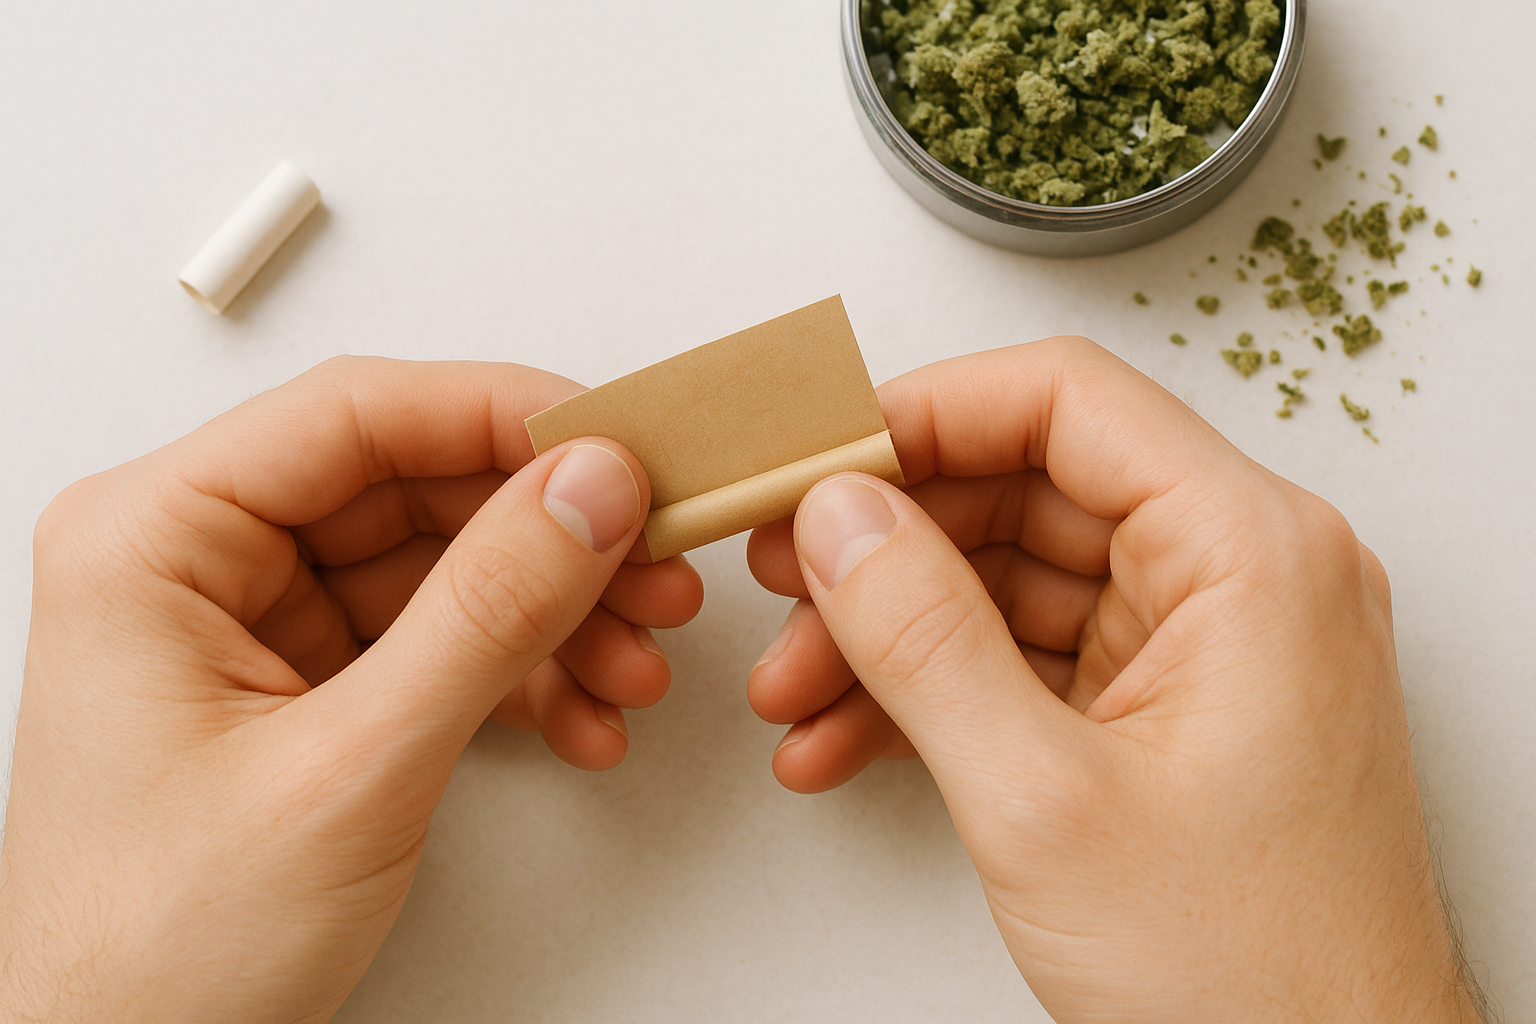
- Fold one end of the strip into a tight accordion using three to four back-and-forth folds.
- Roll the remaining length of the strip around the accordion fold to form a cylinder.
- Hold it loosely so it can expand slightly and allow airflow when you draw.
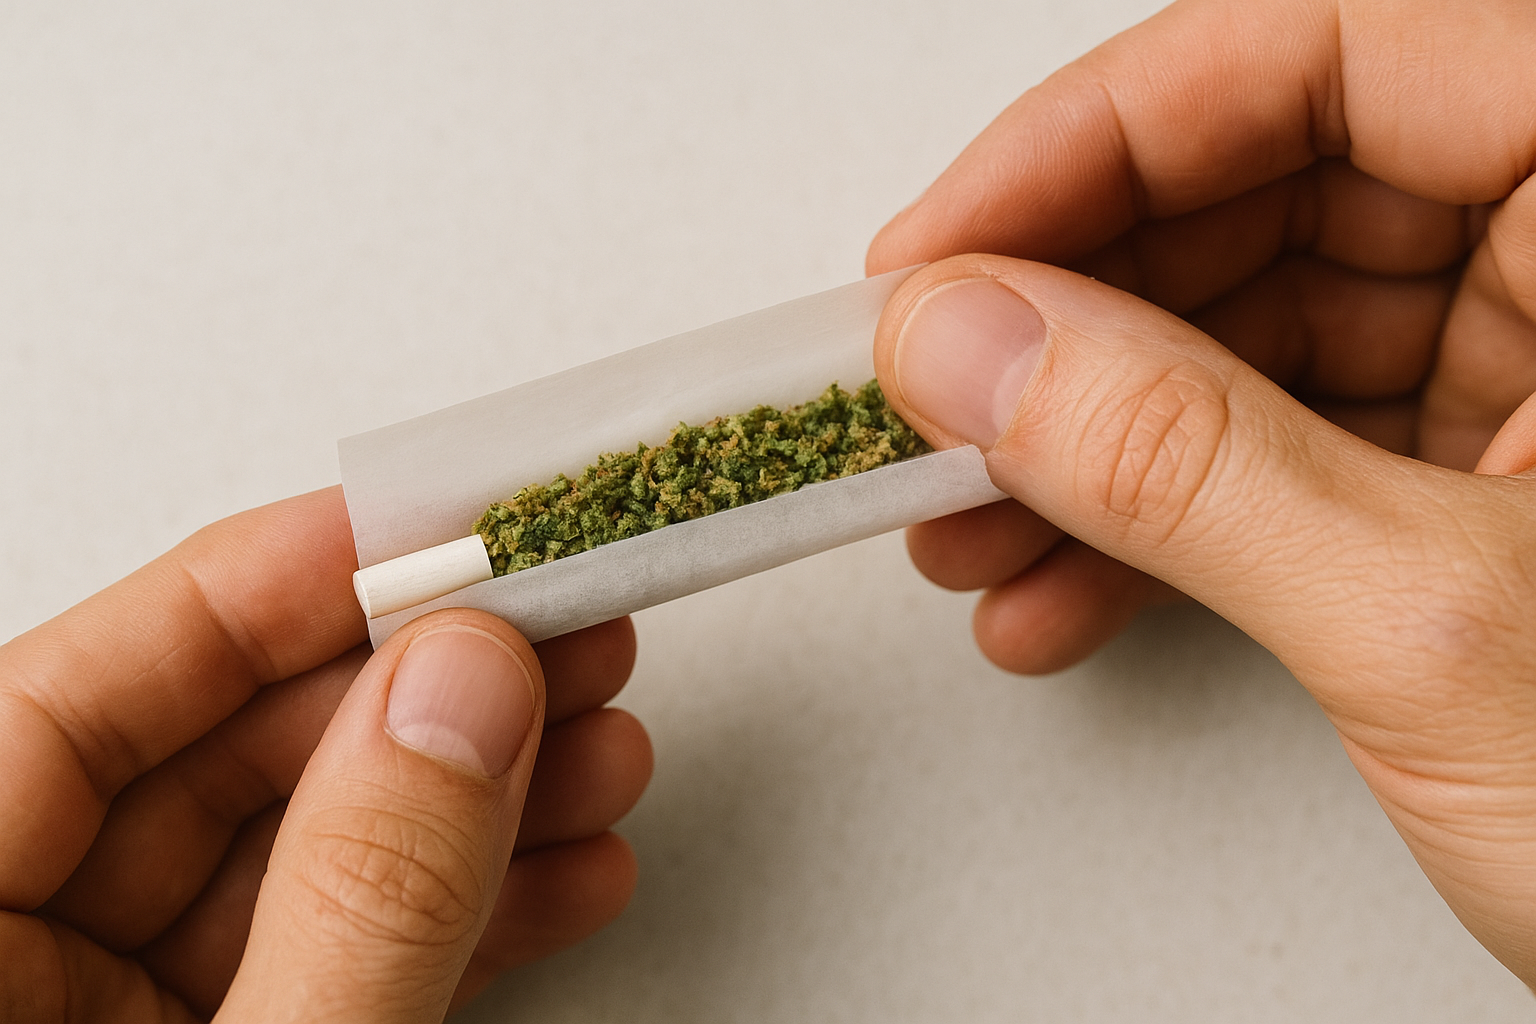
Step 2. Fill the paper and shape an even cylinder
With your ground flower and filter tip ready, it's time to load the paper. This step is where most beginners lose control of the roll, so slowing down here pays off in a much cleaner finished joint. Understanding how to roll a joint that holds its shape starts with how you distribute the flower before a single roll happens.
Position your paper correctly
Hold the paper lengthwise with the glue strip facing up and angled slightly toward you. Place your filter tip at one end, then pour your ground flower into the natural crease the paper forms when you hold it between your fingers. The paper acts like a small trough, which keeps the flower centered while you work.
Here is how to distribute flower so it fills evenly:
- Pour flower into the center crease, not along the edges
- Spread it from filter to tip, stopping about 5mm from the open end
- Use a fingertip to break apart any clumps before moving to the shaping step
Shape the cylinder before you roll
Pinch the paper between your thumbs and index fingers along the full length, then gently rock it back and forth to shift the flower into a consistent, cylindrical shape. Your goal is an even diameter from the filter end to the tip with no lumps or thin spots.
Do not overfill. A standard 1g joint needs less flower than most beginners expect. Overfilling makes shaping nearly impossible and produces a joint that draws too tight.
Work slowly and nudge any uneven sections with your fingertips until the shape feels uniform before you move on.
Step 3. Roll, seal, and pack for a smooth draw
This is the step where your joint either comes together or falls apart. Rolling the paper correctly is the critical move in learning how to roll a joint, and it requires a steady, controlled motion rather than speed. Take your time through each part of this step and you will end up with a tight, even cylinder that draws smoothly from the first pull.
Rolling and sealing the paper
Start at the filter end and use your thumbs to tuck the unglued edge of the paper down and around the flower, rolling it toward you. Keep the tuck tight against the filter tip, since that anchors the roll and sets the shape for the rest of the joint. Once the tuck sits snug all the way along the length of the joint, lick the glue strip lightly and press it down from filter to tip in one smooth motion.
Do not over-wet the glue strip. A thin, even lick is enough. Too much moisture weakens the seal and can cause the paper to tear before it dries.
Packing for an even draw
Use a pen or thin dowel to gently pack the flower down through the open tip of the joint. This closes any air pockets that cause uneven burning and gives you a consistent draw. Twist the open end closed after packing to keep everything in place until you are ready to light.
A properly packed joint has two clear signs you can check before you spark it:
- The cylinder feels firm but not rock-hard when you squeeze it lightly
- Airflow through the filter has slight resistance but is not fully blocked
Step 4. Light it evenly and troubleshoot burn issues
The last step in learning how to roll a joint is lighting it correctly. A poor light undoes solid preparation and leads to the exact burn problems you worked to avoid, so the technique here matters just as much as everything that came before it.
How to light for an even start
Hold the flame about a centimeter from the tip rather than pressing it directly against the paper. Rotate the joint slowly between your fingers while you apply heat, letting the entire tip catch before you take your first pull. Toasting the tip this way builds a clean, even cherry from the start and reduces the chance of a lopsided burn developing mid-session.
Avoid holding a stationary flame against one spot. Moving the flame in small circles around the tip distributes heat evenly and prevents one side from burning faster than the other.
Take your first draw slowly after the tip is fully lit. A hard, fast pull collapses the cherry and drags too much heat through the joint before the burn has a chance to stabilize.
Fixing common burn problems
Two burn issues come up most often: canoeing and runs. A canoe forms when one side burns faster than the other, and a run is when the paper splits ahead of the flower. Here is how to fix each one:
| Problem | Cause | Fix |
|---|---|---|
| Canoeing | Uneven light or loose pack | Rotate and apply flame to the slow-burning side |
| Run | Wet seal or thin paper spot | Dampen the running edge lightly with a fingertip to slow it |
Catching either problem early keeps a small burn issue from ruining the rest of your session.
Quick wrap-up
Learning how to roll a joint comes down to four repeatable steps: prep your flower and filter, load and shape the paper, roll and seal it tight, then light the tip evenly before your first pull. Each step builds on the one before it, so rushing any part of the process will show up in the final product. Most beginners see a real improvement by their third or fourth attempt once the muscle memory starts to settle in.
Practice is the only shortcut here. If you want a no-frustration option while you build your rolling skills, pre-rolled cones skip the hardest parts entirely and still deliver a clean, consistent smoke every time. You get the same quality result without the learning curve. Check out the full range of RAW pre-rolled cones at Green Blazer and find the size and paper style that fits your session.