

A dirty dab pen doesn't just taste bad, it actually wastes your concentrate and can cut the life of your device in half. If you've noticed weaker vapor production, a burnt flavor, or sticky residue building up around the mouthpiece, it's time to learn how to clean a dab pen properly.
Regular cleaning keeps your hits smooth, your flavors pure, and your pen working the way it should. At Green Blazer, we're all about a quality smoking experience, whether that's through the RAW pre-rolled cones and accessories we sell or the guides we put together to help you take better care of your gear. A clean device matters just as much as clean, natural products.
This guide walks you through the full process step by step, from the mouthpiece to the heating chamber to the battery connections. You'll learn what supplies you need, how often to clean each component, and a few tricks for unclogging a pen that's already giving you trouble. Let's get into it.
What you need and safety checks
Before you start learning how to clean a dab pen properly, you need the right tools ready and waiting. Using the wrong materials can damage your coil, strip the threading on your chamber, or leave residue inside the pen that corrupts the flavor of your next session. Spending three minutes getting set up correctly makes the entire cleaning process faster, safer, and far less likely to end with a broken device.
Your cleaning supply list
Having everything within reach before you disassemble anything means you won't stop mid-clean to hunt around the house. Most of these items are inexpensive and easy to find at any drugstore or grocery store, so there's no reason to skip putting together a proper kit.
Here's what you need:
| Item | Purpose |
|---|---|
| 91%+ isopropyl alcohol | Primary solvent for dissolving wax and sticky residue |
| Cotton swabs (Q-tips) | Reaching inside the chamber and around the coil |
| Microfiber cloth or paper towels | Wiping down outer surfaces without scratching |
| Small zip-lock bag or glass jar | Soaking removable plastic or glass parts |
| Toothpick or dental pick | Loosening stubborn clogs without scratching surfaces |
| Warm water | Rinsing non-electronic parts after soaking |
Use 91% isopropyl alcohol or higher whenever possible. Lower concentrations contain significantly more water, which slows evaporation and raises the risk of moisture reaching areas where it can cause real damage. Avoid using acetone, bleach, or any other harsh solvents, as these will degrade rubber seals and plastic components fast.
Always confirm that your isopropyl alcohol is at least 91% concentration before you start. Lower concentrations take much longer to evaporate and can leave water residue dangerously close to the heating element.
Safety checks before you start
Skipping a quick safety check is the fastest way to destroy a device that was otherwise working fine. The first thing you need to do is turn off your pen completely and disconnect the battery if your model allows it. Never clean a pen that is still powered on, charging, or warm from a recent session.
Check the battery connection points for any visible corrosion or gunk buildup before you apply any liquid anywhere near the device. If you notice corrosion, use a dry cotton swab to gently clear those contact points first, then keep all liquids well away from them throughout the entire process. Isopropyl alcohol and battery contacts are a bad combination, and a short circuit will end your pen's life far more quickly than any wax buildup ever could.
Give your pen at least 20 to 30 minutes to cool down after use before you start cleaning. Touching a hot coil with a cotton swab can cause the fibers to fray and wrap themselves around the heating element, which creates a real problem the next time you fire it up. Taking a short break before you begin protects both the device and the quality of your future sessions.
Step 1. Disassemble and prep the parts
Disassembling your pen in the right order protects the most fragile components from accidental damage. Most dab pens share the same three core sections: the mouthpiece, the heating chamber (which holds the coil), and the battery. Understanding how these pieces connect before you pull anything apart will save you from stripping threads or cracking a chamber cap. This first step is what separates a quick, effective clean from one that ends with a broken device.
Know your pen's layout
Take a moment to look at your device before you unscrew anything. Different brands use different connection styles, and knowing yours upfront prevents costly mistakes. The mouthpiece typically twists or pulls off depending on the model, while the chamber usually screws counterclockwise to detach from the battery. If your pen came with a manual, pull it up for reference before you start learning how to clean a dab pen the right way.
Here are the main parts you will be separating:
- Mouthpiece: the top piece you inhale from; usually removable by twisting or pulling
- Chamber/atomizer: holds the coil and collects the majority of wax residue
- Battery: the bottom section; keep this away from any liquids throughout the process
- Mouthpiece cover or cap: a small piece some pens include; set it somewhere visible so you don't lose it
Take it apart without breaking anything
Grip the chamber with two fingers and turn counterclockwise slowly. Most chambers are hand-tight only, which means you should not need tools. If it feels stuck, don't force it. Cupping the connection point in your hands for about 30 seconds can loosen hardened wax that's acting like a seal between parts.
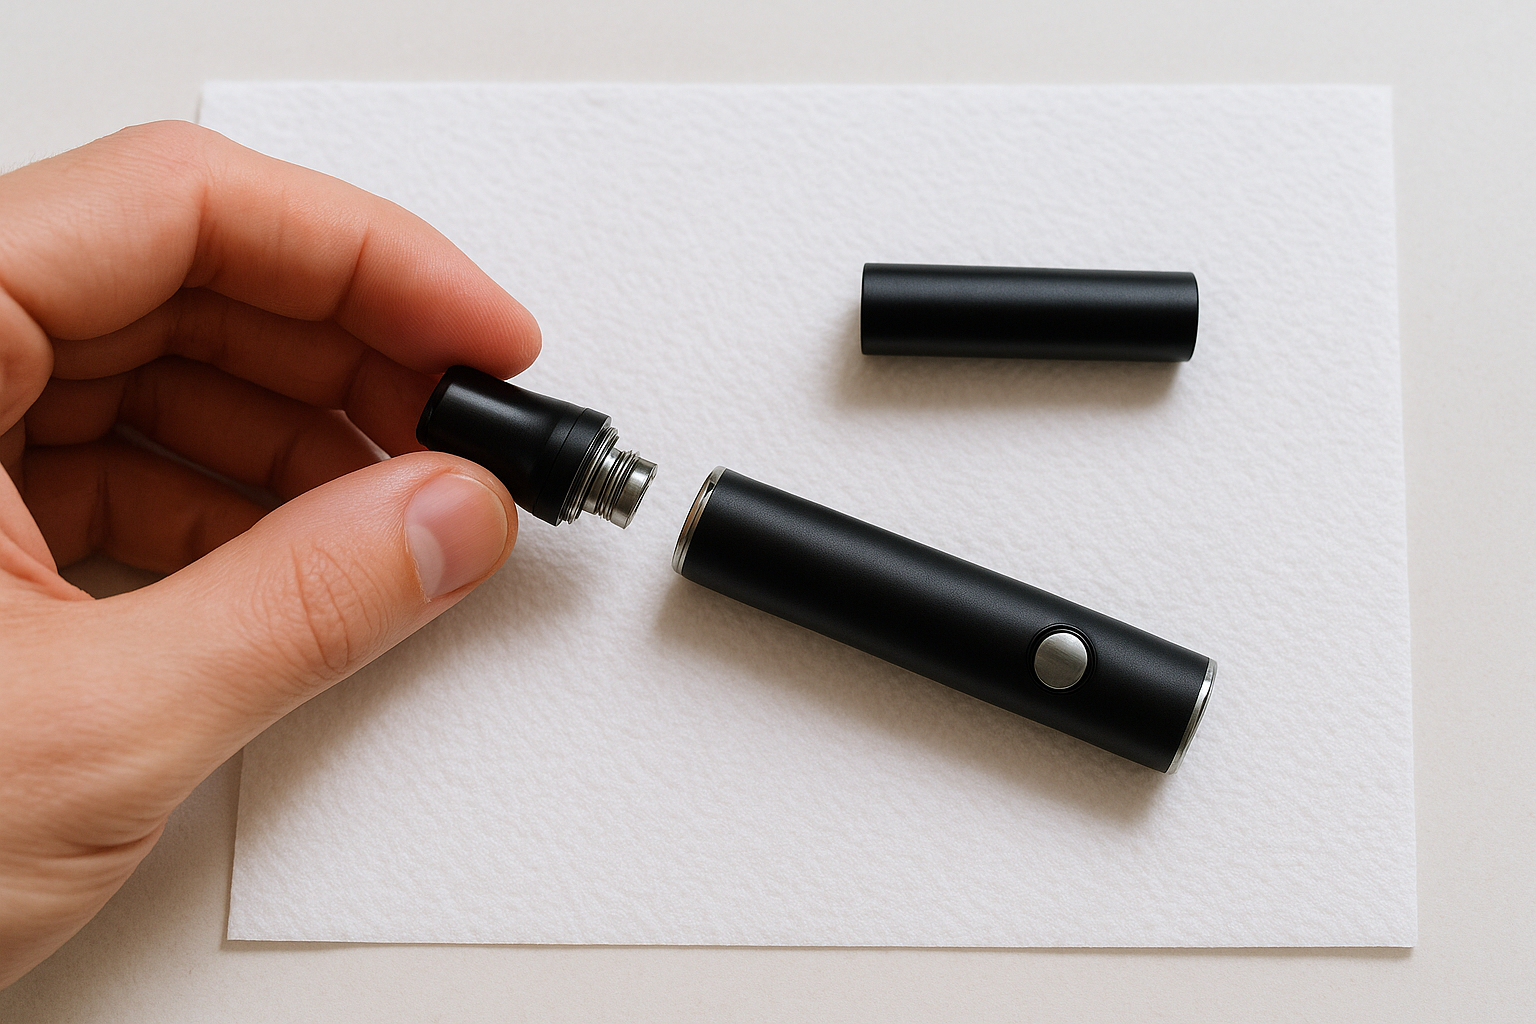
Never use pliers or any tool to force a stuck chamber loose. The threading on most dab pens is soft metal, and even moderate force will strip it permanently.
Once everything is separated, lay each part out on a paper towel in order so you know exactly how they go back together. This small step makes reassembly straightforward and keeps you from mixing up components mid-clean.
Step 2. Clean the mouthpiece and airflow
The mouthpiece collects more residue than any other part of your pen because every hit passes directly through it. Over time, wax vapor condenses inside the airflow channel and hardens into a sticky film that reduces airflow and ruins flavor. Cleaning this component thoroughly is one of the most important steps in learning how to clean a dab pen, and it also happens to be one of the easiest parts to get right.
Soak and scrub the mouthpiece
Start by submerging your mouthpiece in a small container of 91%+ isopropyl alcohol for five to ten minutes. The soak does most of the heavy lifting by dissolving hardened wax buildup before you touch it with a swab. If your mouthpiece is made from plastic rather than glass, limit the soak to three minutes since prolonged exposure to alcohol can make some plastics brittle over time.
After soaking, use a cotton swab dampened with fresh isopropyl alcohol to scrub the inside channel. Rotate the swab as you push it through the opening so you pick up residue from all sides of the tube rather than just pushing it further in. Repeat with a fresh swab until the cotton comes out clean.
If the airflow channel is narrow and a standard Q-tip won't fit, twist a small piece of paper towel into a point, dampen it with isopropyl alcohol, and thread it through the opening instead.
Clear the airflow path
Restricted airflow is the most common complaint from people who skip regular cleaning, and it almost always traces back to buildup inside the small holes or vents on the mouthpiece or chamber connection point. Hold your mouthpiece up to a light source and look straight through it. You should see clear passage with no visible obstruction before you consider this step complete.
Use a toothpick to gently clear any visible blockage from the vent holes, working carefully to avoid scratching the interior surfaces. Follow up with a dry cotton swab to remove any loosened debris before moving on.
Step 3. Clean the chamber, coil, and threads
The heating chamber is where most of your concentrate residue collects, and it requires a more careful approach than the mouthpiece. Rushing this step or using too much liquid near the coil is one of the most common ways people damage their device when learning how to clean a dab pen for the first time.
Clean the heating chamber walls
Start with a cotton swab lightly dampened with 91%+ isopropyl alcohol and wipe down the interior walls of the chamber. You're targeting the dark, sticky buildup that coats the sides after repeated sessions. Work in small circular motions so the swab picks up residue rather than just spreading it around. Follow up immediately with a dry cotton swab to absorb any remaining alcohol before it has a chance to migrate toward the coil.
Never drop liquid alcohol directly into the chamber. Pouring or dripping solvent onto the coil can saturate the wicking material and destroy the heating element permanently.
Protect the coil
Your coil is the most delicate part of the entire device, and it demands a light touch. Use a dry cotton swab only to gently wipe around the base of the coil where wax tends to pool and harden. Avoid pressing down directly on the coil wires themselves since even moderate pressure can bend or break them.
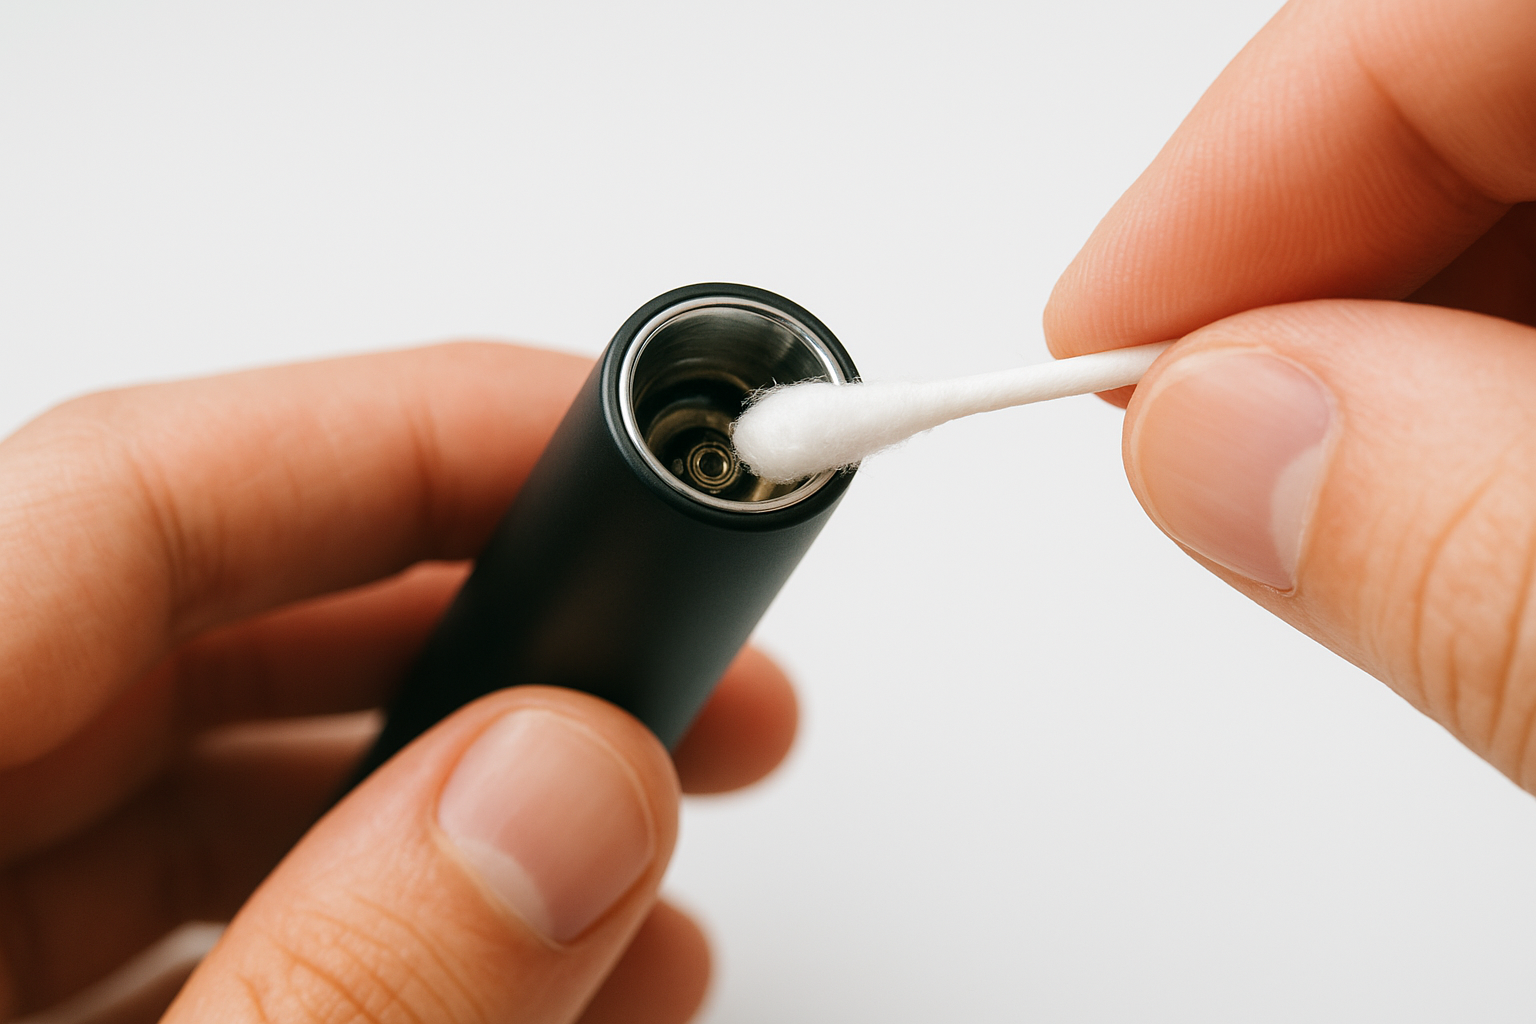
For ceramic or quartz coils, a quick low-temperature burn-off before cleaning helps loosen hardened residue. Fire the pen for one to two seconds without any concentrate loaded, which softens the buildup so your swab picks it up far more easily during the wipe-down.
Clear the threads
The threaded connection between your chamber and battery traps sticky wax residue that builds up session after session. Wrap a cotton swab lightly with a thin strip of paper towel, dampen it with isopropyl alcohol, and run it along the thread grooves in a slow spiral motion. Finish with a dry swab to remove any remaining alcohol before you move on to the next step.
Step 4. Unclog, dry, and reassemble
If you've followed the previous steps and your pen still pulls tight or produces almost no vapor, you have a clog that cleaning alone hasn't cleared yet. This final step covers how to force out stubborn blockages, give every component the drying time it needs, and put everything back together so your pen fires cleanly from the first hit.
Force out a stubborn clog
A clog sitting deep in the airflow path won't always respond to swabbing. The most reliable fix is a gentle warm-air method: hold your disassembled mouthpiece between two fingers and blow short, firm bursts of air directly through it. This pushes loosened residue out the far end rather than packing it deeper. If that doesn't clear it, soak the mouthpiece in 91%+ isopropyl alcohol for an additional five minutes, then blow through it again immediately while the residue is still soft.
For a clogged chamber airhole, use a toothpick to carefully clear the opening with one or two light passes, then follow with a dry cotton swab. Avoid rotating the toothpick aggressively since this scratches the chamber interior and creates rough surfaces where wax sticks even faster next session.
Never fire the battery while the chamber is detached in an attempt to burn off a clog. This damages the connection point and can ruin the battery permanently.
Dry everything completely
Rushing this step destroys devices. Every part must be completely dry before you reassemble, and that means setting them flat on a clean paper towel for a minimum of 15 to 20 minutes after any alcohol contact. Isopropyl alcohol evaporates on its own, but only if you give it time.
Run through this quick check before you reassemble:
- Mouthpiece interior feels dry to the touch
- Chamber walls show no visible moisture
- Thread grooves on both the chamber and battery look clear and dry
Reassemble in the right order
Knowing how to clean a dab pen only pays off if you reassemble correctly. Thread the chamber onto the battery clockwise by hand until it's snug, then attach the mouthpiece so it sits flush with no gaps. Power the pen on and confirm it fires normally before loading any concentrate.
Keep it clean for next time
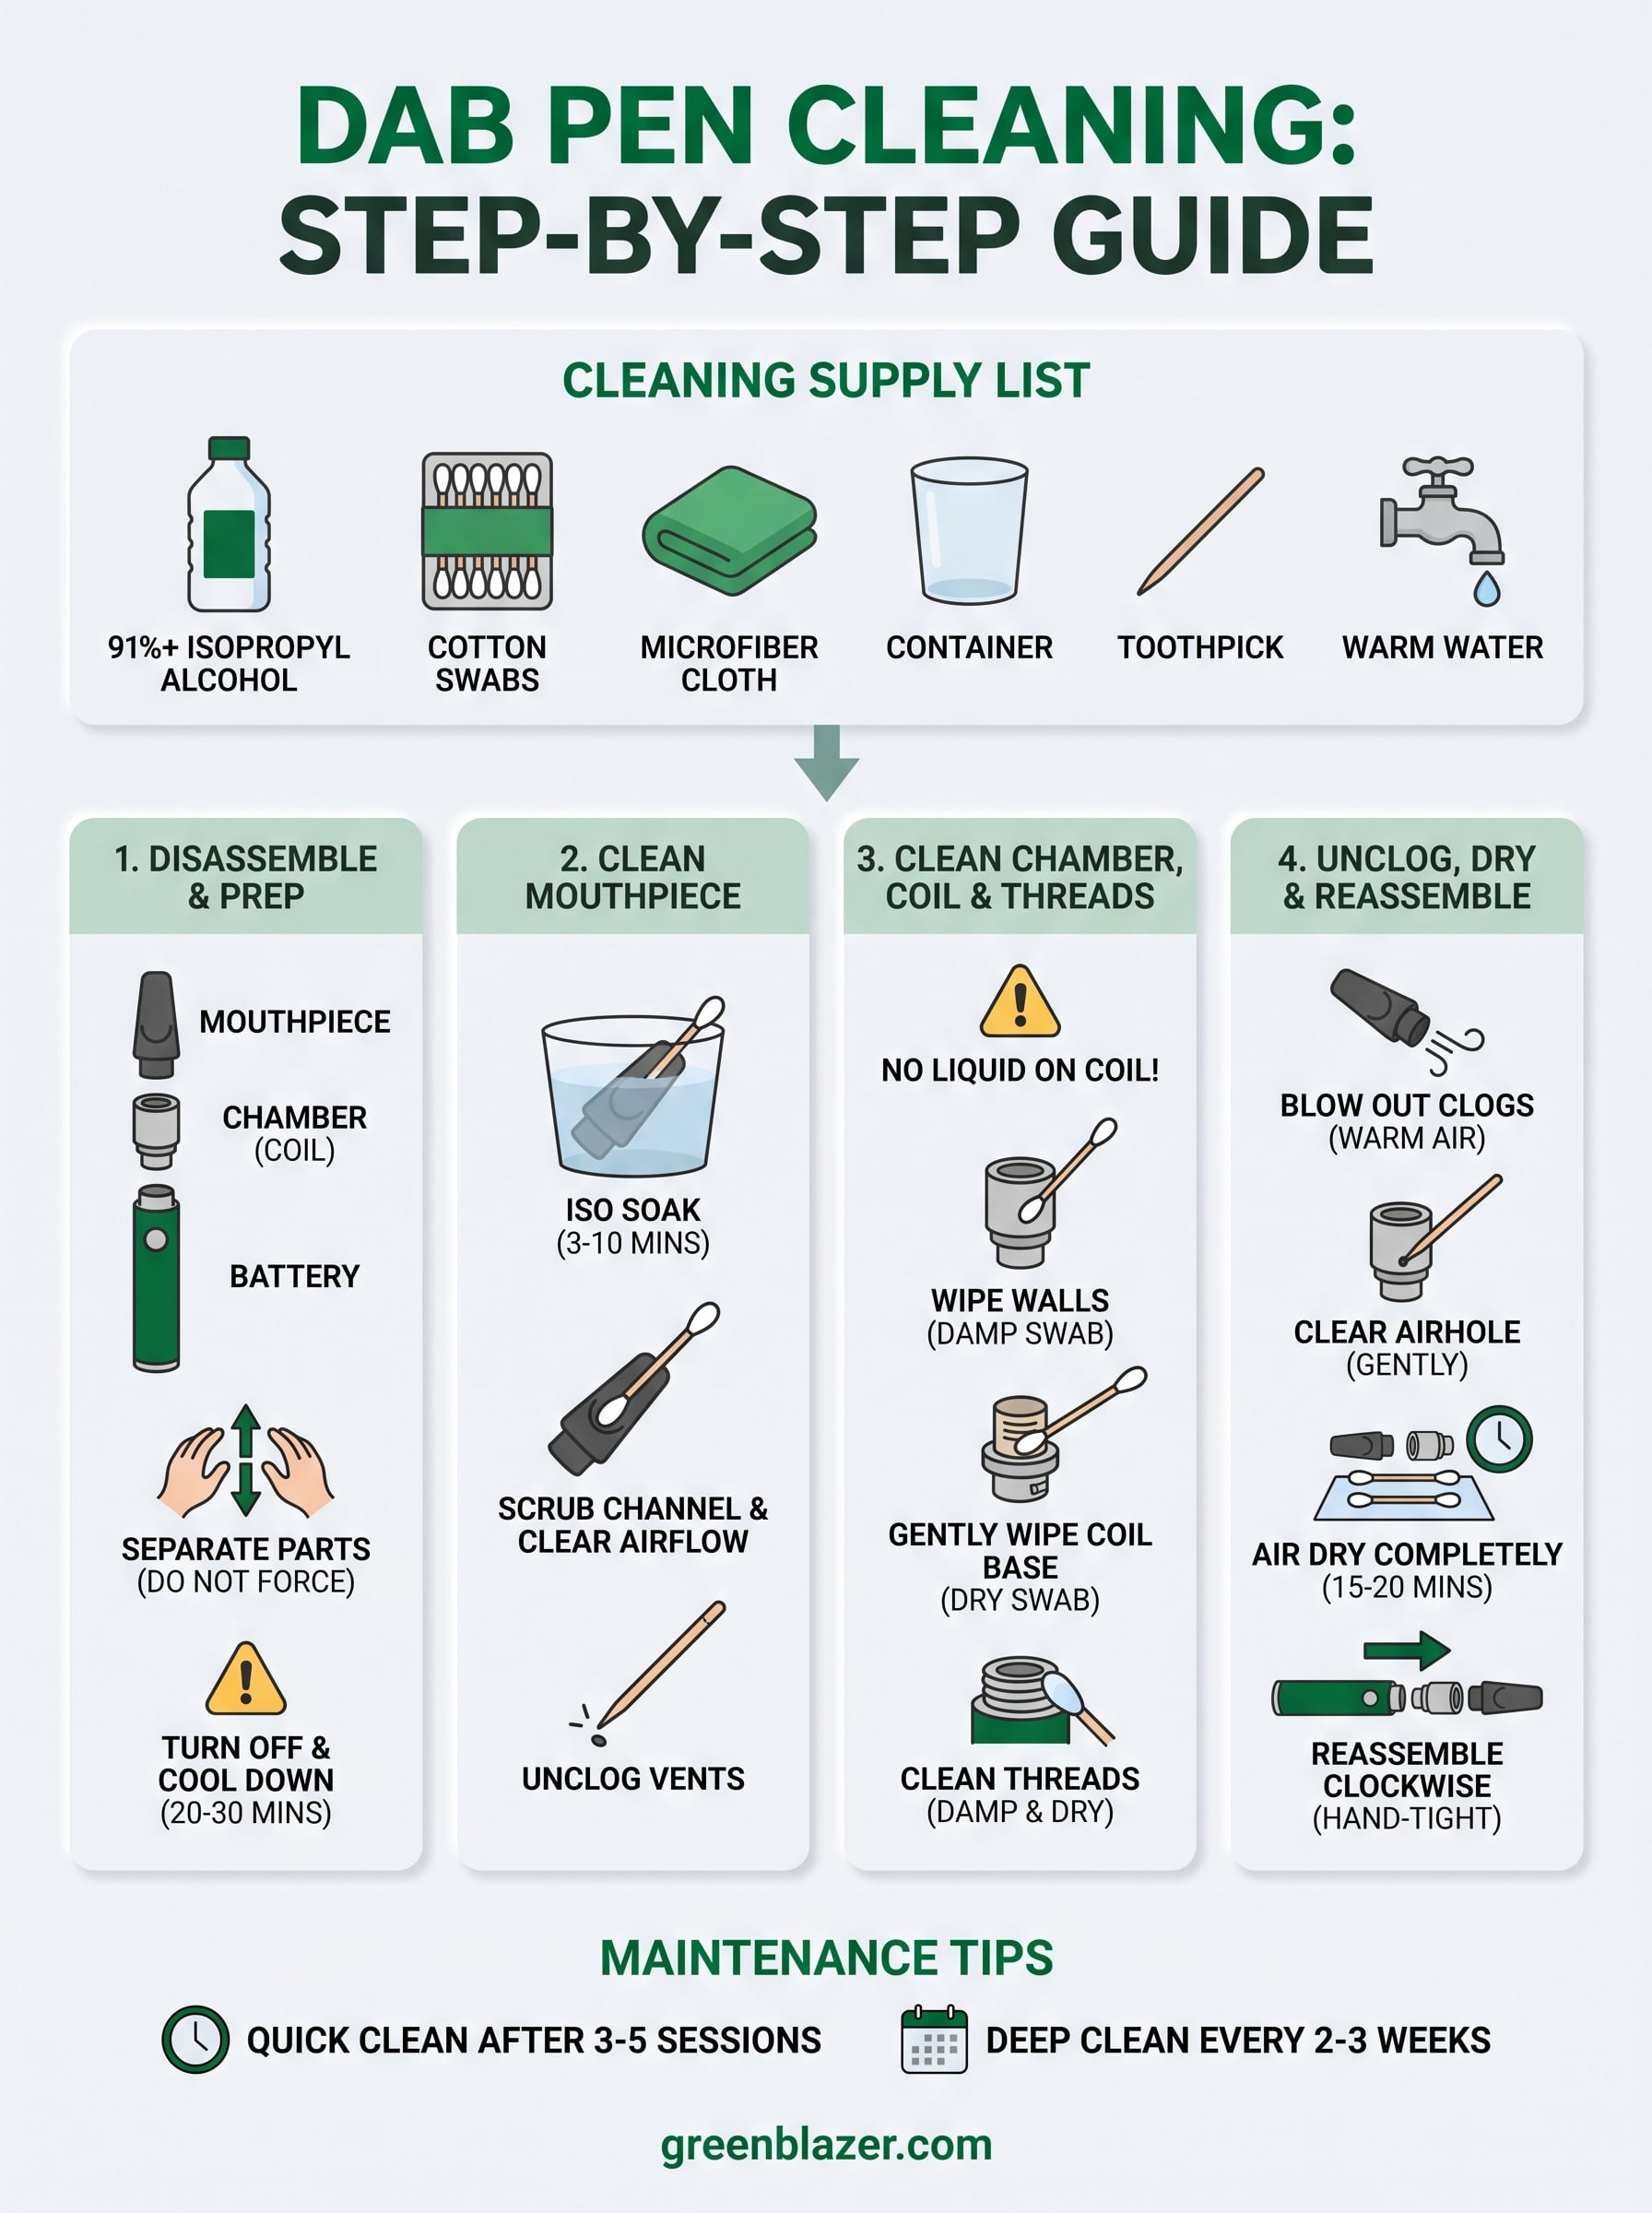
Now that you know how to clean a dab pen from top to bottom, the smartest move is to make it a habit rather than a rescue operation. Quick maintenance after every three to five sessions takes less than two minutes and prevents the kind of hardened buildup that turns a simple wipe-down into a 30-minute project. After each session, run a dry cotton swab around the chamber walls while the pen is still slightly warm, since wax is far easier to lift before it cools and hardens.
Set a reminder to do a full deep clean every two to three weeks if you use your pen regularly. Storing your pen upright between sessions also reduces the chance of concentrate migrating into the airflow path and creating clogs. Small habits protect your coil, extend the life of your device, and keep every session tasting clean.
For premium pre-rolled cones and smoking accessories that match your standards, visit Green Blazer and see what's in stock.
