

That gunky, brown residue coating your glass bowl doesn't just look bad. It clogs airflow, muddies the flavor, and makes every hit harsher than it needs to be. If you're wondering how to clean a glass bowl without cracking the glass or leaving behind a chemical aftertaste, you're in the right place.
The fastest, most reliable method uses isopropyl alcohol and coarse salt, a combo that breaks down resin in minutes with a bit of shaking. But it's not your only option. Vinegar and baking soda work well for lighter buildup or if you're out of alcohol, and each method has tradeoffs in speed, smell, and how much scrubbing you'll need to do afterward.
Below, we walk through each cleaning method step by step, from soaking times to rinsing tips that keep your glass clear and your next session tasting clean. We'll also cover how often you should actually clean your bowl and what tools make the job faster. Whether you're maintaining a spoon pipe or prepping glass before packing a fresh RAW cone, a clean bowl means a better smoke every time.
Why your glass bowl needs regular cleaning
Every time you spark a bowl, the herb burns and leaves behind tar and resin buildup that sticks to the glass. That residue builds up fast, and within a few sessions you'll notice harsher hits and a burnt, bitter taste that masks whatever flavor your herb actually has. Glass doesn't absorb resin the way wood or metal does, which is exactly why smokers prefer it, but that same nonporous surface means the gunk just sits there until you scrub it off.
The hidden cost of a dirty bowl
Resin buildup does more than ruin flavor. It narrows the airflow path inside the bowl, forcing you to pull harder to get smoke moving. That extra suction pulls more tar and ash into your lungs with every hit. A clogged bowl also burns unevenly, so you waste more herb getting the same effect you'd get from a clean piece using half as much.
A dirty bowl doesn't just taste bad, it wastes your herb and your lungs.
What buildup looks like at each stage
Resin doesn't appear overnight. It accumulates in stages, and knowing what you're looking at helps you decide how aggressive your cleaning method needs to be.
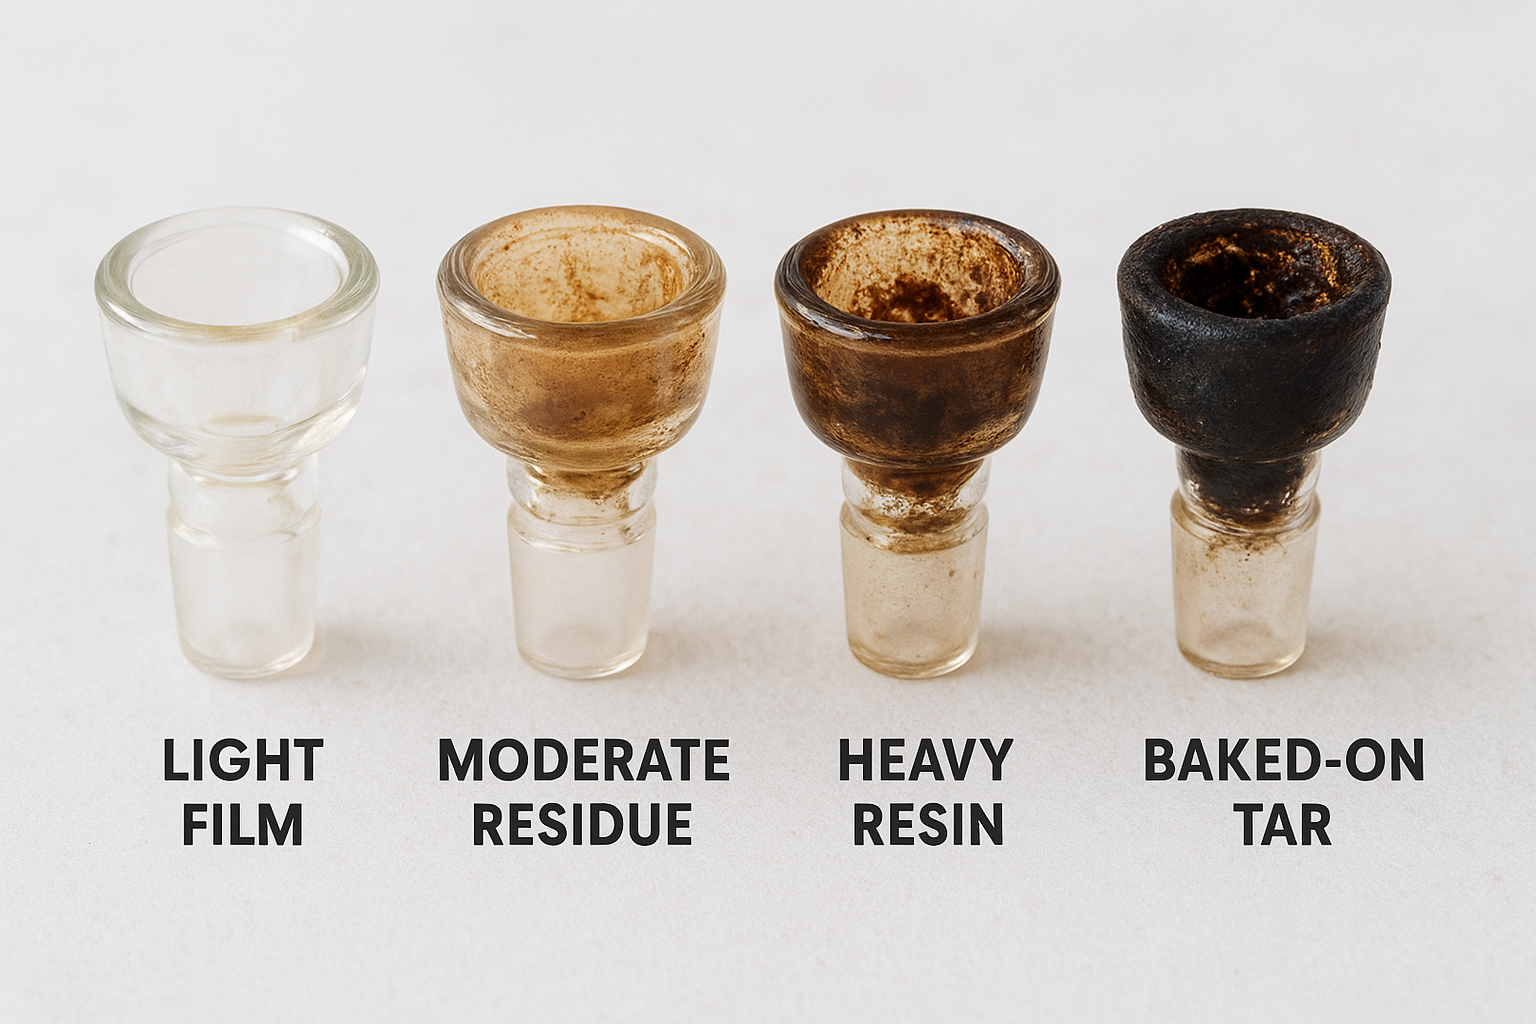
| Buildup Stage | Appearance | Cleaning Approach |
|---|---|---|
| Light film | Faint yellow tint, glass still see-through | Quick alcohol rinse |
| Moderate residue | Brown coating, reduced airflow | Alcohol and salt soak |
| Heavy resin | Thick, sticky, blocks the hole | Extended soak plus scrubbing |
| Baked-on tar | Black, crusty, nearly solid | Multiple soaks, possible pipe cleaners |
Catching buildup at the light film stage saves you time later. Most regular smokers find that weekly cleaning keeps the bowl at that first stage indefinitely, while waiting a month or more pushes you straight into heavy resin territory where a simple rinse won't cut it. Since you're already taking care to pack a RAW pre-rolled cone for a slow, even burn or load your bowl the right way, giving the glass the same attention pays off in flavor and airflow every single time you light up.
Step 1. Gather your cleaning supplies
Before you touch the bowl, line up everything you need so the soak doesn't stall halfway through. Most of these items are already in your kitchen or bathroom cabinet, which is part of why this method beats buying specialty pipe cleaner. Grab a resealable plastic bag or small jar with a tight lid, enough isopropyl alcohol (91% or higher works fastest) to fully submerge the bowl, and coarse kosher or rock salt, which scrubs the glass from the inside as you shake it.
Swap in white vinegar and baking soda if you're avoiding alcohol fumes or don't have any on hand, though expect a longer soak time. You'll also want a soft-bristle brush or a couple of pipe cleaners for detail work, plus cotton swabs for tight corners around the carb hole. Keep a small towel nearby for the rinse step.
The right supplies turn a ten-minute chore into a five-minute one.
Supply checklist
- Resealable bag or jar with lid
- Isopropyl alcohol (91%+) or white vinegar
- Coarse salt or baking soda
- Soft-bristle brush or pipe cleaners
- Cotton swabs
- Clean towel for drying
Having everything staged before you start means you won't leave the bowl half-soaked while you dig through a cabinet, and it keeps the whole process contained to one sitting.
Step 2. Soak the bowl in alcohol and salt or vinegar
Drop the bowl into your bag or jar, then pour in enough isopropyl alcohol to cover it completely. Add a generous pinch of coarse salt, seal the container tight, and shake for about a minute. The salt acts like tiny scrub brushes, knocking resin loose as the alcohol dissolves it, so you get mechanical and chemical cleaning happening at once. Let it sit for 15 to 20 minutes, then shake again before checking progress.
Shaking does the scrubbing for you, so let the salt and alcohol handle the heavy lifting first.
Going the vinegar route works the same way, just slower, the same tradeoff you weigh when cleaning a one hitter pipe. Swap the alcohol for white vinegar and the salt for baking soda, seal the bag, and expect to wait closer to an hour for comparable results. This method skips the fumes entirely, which matters if you're cleaning in a small apartment or don't want the alcohol smell lingering on your hands.
Soak checklist:
1. Fill bag/jar with alcohol (or vinegar)
2. Add coarse salt (or baking soda)
3. Seal and shake for 60 seconds
4. Rest 15-20 min (alcohol) or 45-60 min (vinegar)
5. Shake again, inspect bowl
Heavy resin sometimes needs a second soak, much like the repeat treatment it takes to get resin out of a metal grinder. Repeating the process costs you another 15 minutes but beats scraping at hardened tar with a metal tool that can scratch the glass.
Step 3. Scrub away stubborn resin
Once you've drained the alcohol or vinegar, you'll usually see chunks of resin floating loose in the liquid, but some spots need extra attention. Focus on the carb hole and the bottom of the bowl, where tar tends to cake up thickest. Dip a pipe cleaner or cotton swab in fresh alcohol and work it into these tight spots, twisting as you go to lift what the soak couldn't reach on its own.
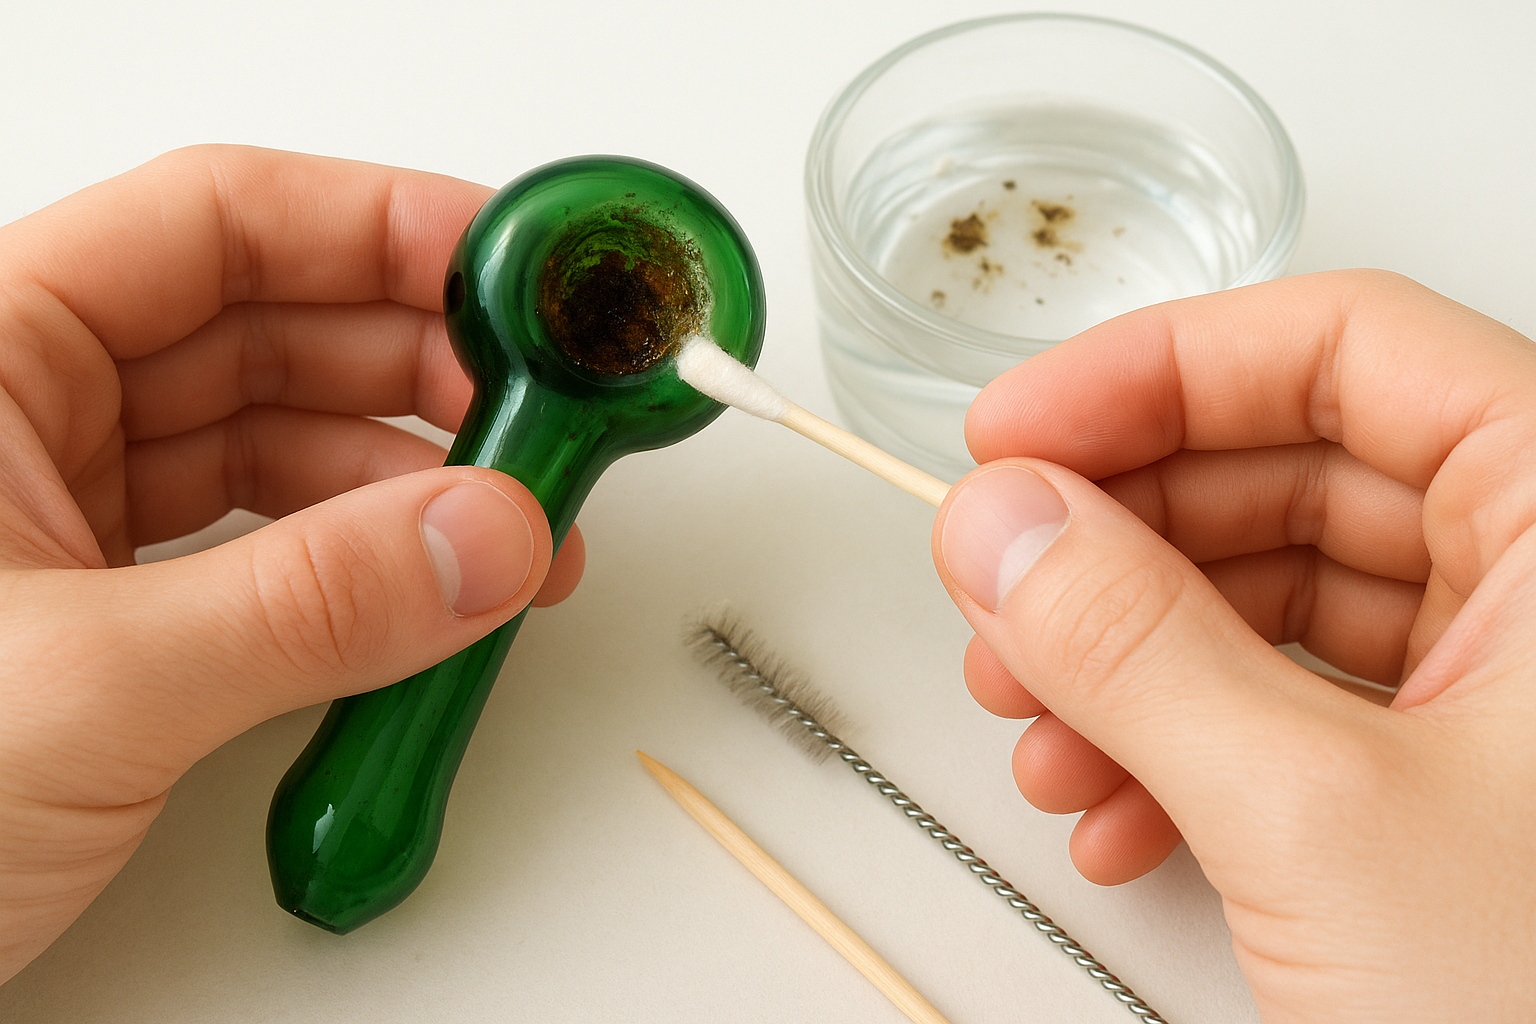
Grit still clinging to the glass after a soak means you're dealing with baked-on tar rather than fresh resin. A soft-bristle cleaning brush handles most of this, but for corners a wooden toothpick works better than metal, since metal tips can scratch or chip the glass around delicate joints.
Patience beats force here, a scratched bowl is harder to fix than a dirty one.
Work through these tools in order, moving to the next only if residue remains:
- Pipe cleaner for the stem and carb hole
- Cotton swab for rounded interior corners
- Soft-bristle brush for the bowl's flat surfaces
- Wooden toothpick for stubborn flecks near the rim
If resin still won't budge after this pass, drop the bowl back into a fresh alcohol and salt mix for another 10 minutes rather than scrubbing harder. Forcing it usually just scratches the glass without actually finishing the job.
Step 4. Rinse, dry, and prevent future buildup
Running water is your final pass, and it matters more than most people think. Hot water flushes out loosened resin and any leftover alcohol or vinegar smell, so rinse the bowl thoroughly under the tap, tilting it to let water pass through the carb hole too. Skip this step and you'll taste chemical residue on your next hit, which defeats the whole point of cleaning in the first place.
Swirl a little rubbing alcohol through one more time if the water alone doesn't clear a faint smell, then rinse again. Once it's odor-free, set the bowl on a towel and let it air dry completely before packing anything. Trapped moisture inside a damp bowl makes herb burn unevenly and can leave a musty taste that ruins your first few pulls.
A bowl that's rinsed but not fully dried undoes half the work you just did.
Going forward, a quick rinse every few sessions keeps resin from hardening into the stubborn buildup you just scraped out. Try this routine:
- Wipe the bowl after each session with a dry cotton swab
- Do a light alcohol rinse weekly
- Save the full salt or vinegar soak for monthly deep cleans
Doing this consistently means you'll spend more time enjoying a fresh RAW cone and less time scrubbing tar.
Keeping your bowl fresh for every session
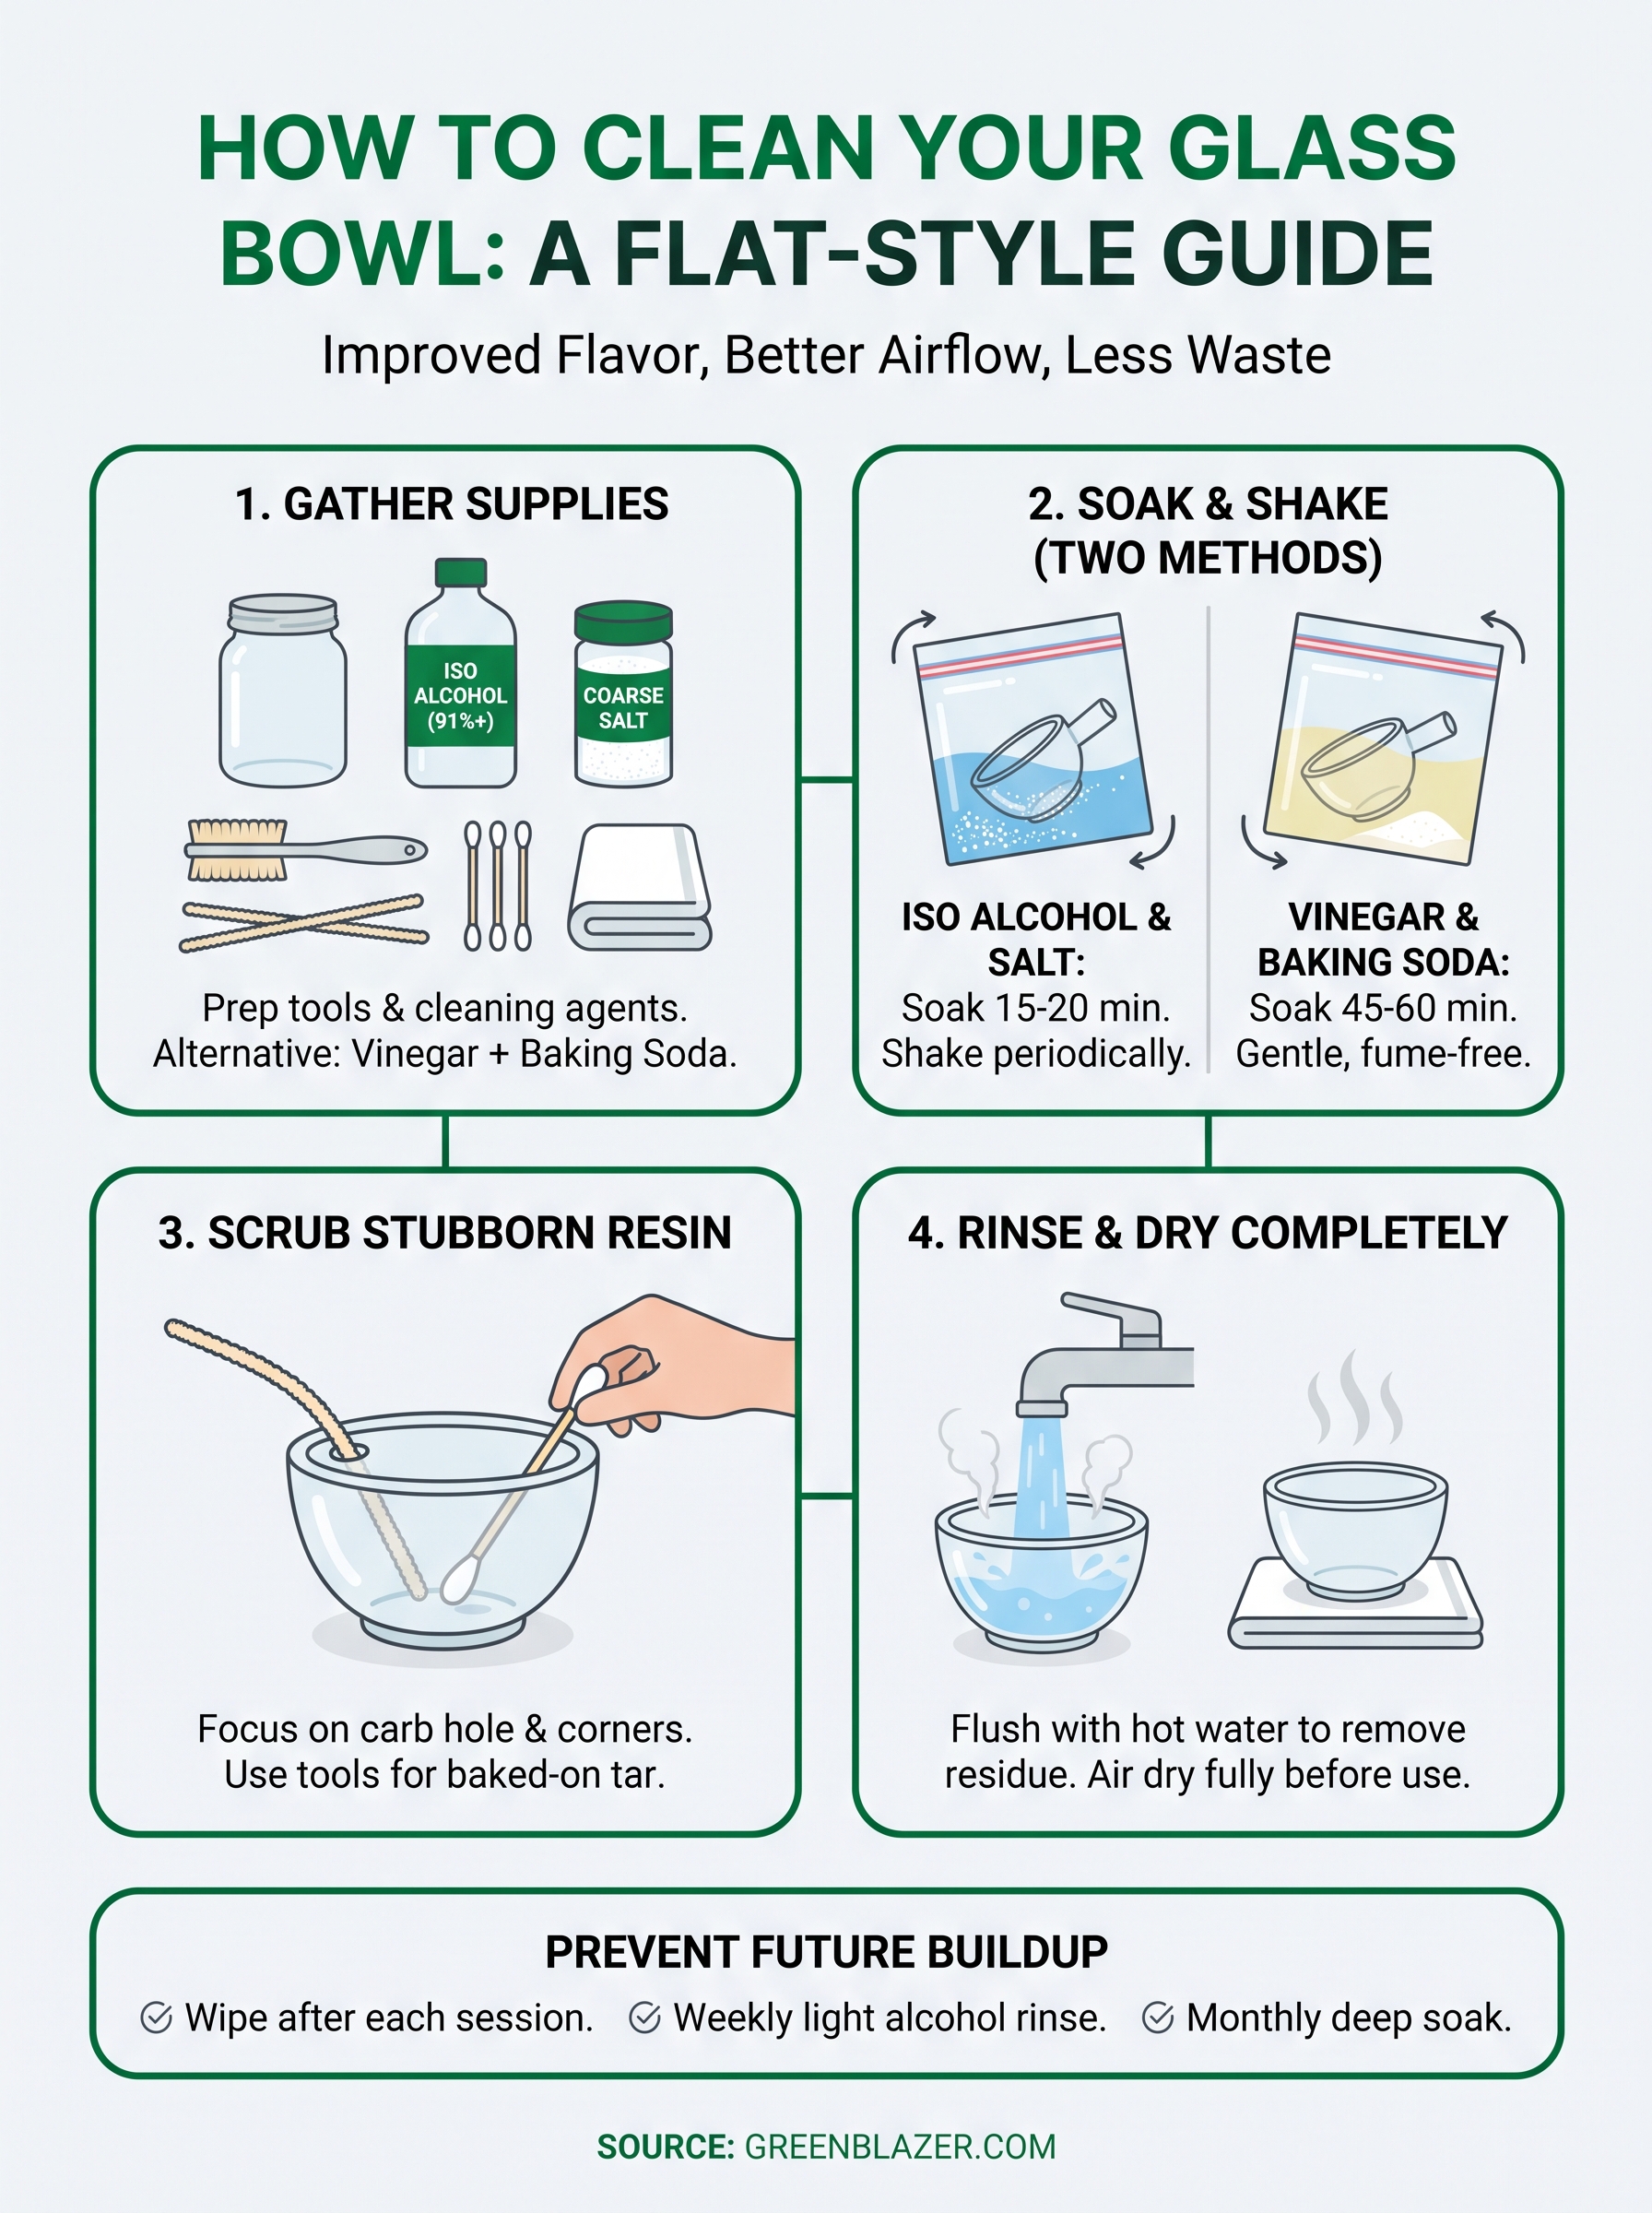
A clean bowl comes down to consistency, not luck. Grab isopropyl alcohol and salt for a fast weekly refresh, or lean on vinegar and baking soda when you want something gentler on your hands and your lungs. Either way, the routine is the same: soak, shake, scrub the stubborn spots, then rinse and dry before you pack anything.
Skipping that last drying step is the most common mistake, and it's the one that leaves your next hit tasting off even after all that scrubbing. Stick to the schedule outlined above and you'll rarely deal with baked-on tar again, just a quick wipe between sessions and an occasional deep soak.
Once your glass is spotless, the smoking material matters just as much as the bowl. Pack it with a clean, additive-free RAW Classic pre-rolled cone and you'll notice the difference in flavor immediately, no lingering resin taste, just the herb itself.
