
A one-hitter pipe is one of the simplest smoking tools you can own, but knowing how to pack a one hitter pipe correctly makes the difference between a smooth, flavorful hit and a frustrating experience filled with clogs or harsh pulls. The small bowl leaves almost no room for error, so your grind consistency, packing pressure, and loading technique all matter more than you might expect.
Most problems people run into, weak hits, blocked airflow, herb falling out, or scorched draws, come down to how the bowl was packed. Too tight and nothing gets through. Too loose and the material burns unevenly or drops right out. Getting it right takes a little know-how, but once you nail it, a one-hitter becomes one of the most efficient ways to smoke.
At Green Blazer, we've built our business around helping smokers get the most from every session, whether that's through RAW pre-rolled cones for effortless smoking or by sharing practical knowledge like this. Below, we'll walk you through the best grind size, the twist-and-press loading method, airflow tips for a clean draw, and common mistakes to avoid so every hit counts.
What a one hitter is and why packing matters
A one-hitter is a small, narrow pipe designed to hold just enough material for a single inhalation. Most bowls hold around 0.1 to 0.25 grams, which is the whole point. You load, you light, you get one clean hit, and you're done. No material sitting in a large bowl between sessions, no relighting several times. Every bit of herb in that chamber has a job to do, which is exactly why knowing how to pack a one hitter pipe correctly matters as much as it does.
The basic anatomy of a one hitter
One-hitters share the same core design across every style. You have a narrow cylindrical tube with a small bowl opening at one end and a mouthpiece at the other. The dugout setup is the most common configuration. It pairs a two-chambered wooden box with a spring-loaded bat that loads directly by pressing and twisting into a compartment pre-filled with ground herb. Standalone glass chillums work the same way but load by hand.
One-hitters come in a few different materials, and each one behaves differently during a session:
- Metal (aluminum or brass): Durable and lightweight, but heats up quickly and retains that heat. Multiple hits in a row can make the tube hot to hold.
- Glass: Stays cooler to the touch and preserves flavor better than metal. More fragile, so handle with care.
- Wood: Absorbs some heat and adds a mild, natural character to the draw. Requires occasional seasoning to prevent cracking.
Most one-hitters run between 2 and 4 inches long. A longer tube gives smoke a little more time to cool before it reaches your mouth. A shorter one delivers a hotter, more direct hit. Knowing your pipe's material and length helps you pace your session and protect your fingers during back-to-back draws.
Why packing directly affects your experience
The bowl on a one-hitter is so small that every variable gets amplified. A grind that's too coarse leaves air gaps in the bowl. Air rushes through without picking up enough material, and you get a thin, unsatisfying hit. Pack it too fine and the herb compresses into a dense plug that blocks airflow entirely. You end up pulling hard, getting nothing, and wasting your material. Packing pressure is the dial that controls airflow, and airflow controls burn quality.
A well-packed one-hitter should draw with moderate resistance, similar to sipping through a slightly narrow straw, not completely open and not fully blocked.
Consistent packing also protects your pipe from damage over time. A bowl stuffed too tight forces you to inhale with extra force, which pulls fine particles and ash through the tube and into your mouth. Those particles build up into sticky resin that clogs the tube and degrades the flavor of every future hit. Packing it right, with the correct grind, the right amount of pressure, and a clean bowl, keeps each session tasting clean and extends the life of your pipe.
Step 1. Choose the right grind and moisture
Your grind is the foundation of every good pack. Knowing how to pack a one hitter pipe correctly starts before you touch the bowl - it starts with how you break down your material. Particle size controls airflow through the packed chamber, and airflow directly determines whether your hit is smooth and even or harsh and blocked.
Target a medium grind
A medium grind is the sweet spot for one-hitters. Particles should be roughly the size of coarse sea salt, fine enough to pack snugly but coarse enough to leave micro-gaps for air to move through. If you use a standard three-chamber grinder, two or three full rotations usually produce the right consistency for a one-hitter bowl. Avoid grinding so fine that the material turns to powder. Powder compacts instantly under any pressure, seals the tube, and kills airflow before you even light up.
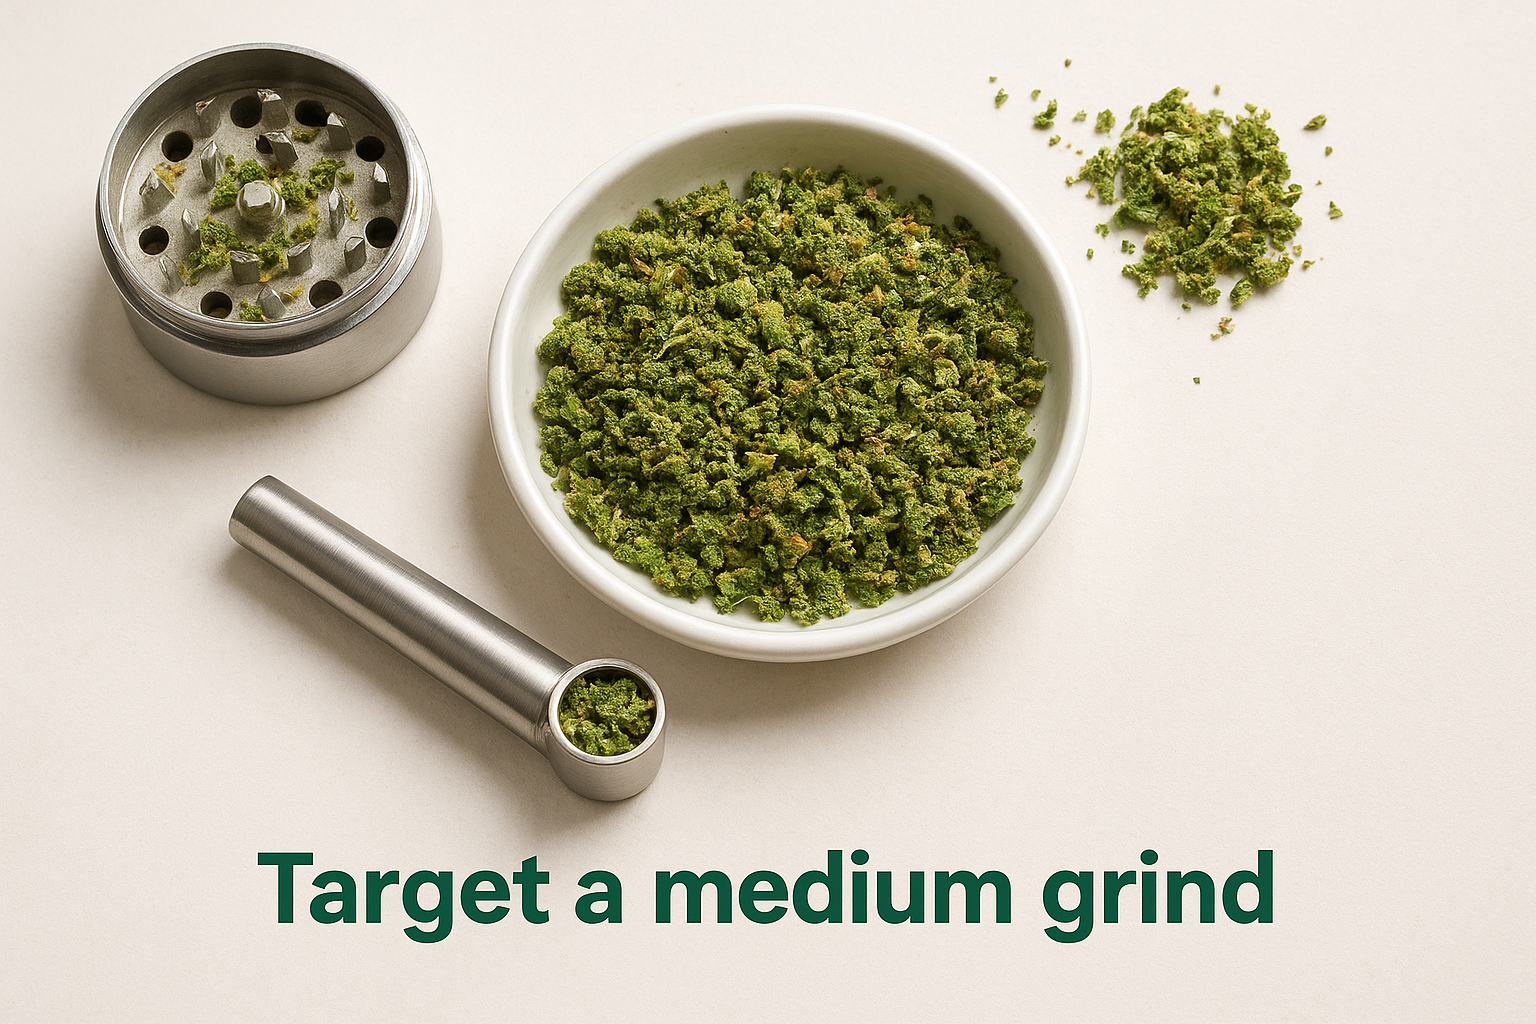
A medium grind fills a one-hitter bowl with the right balance of surface area and air pockets, giving you an even burn and a clean draw on every hit.
Check moisture before you grind
Moisture level matters as much as particle size. Dry, brittle herb crumbles into dust during grinding, burns hot, and produces a harsh draw. Overly moist material clumps together, resists breaking down evenly, and can seal the bowl after the first pull. You want material that springs back slightly when you press it between two fingers - firm but not rigid, with a small amount of give.
If your herb feels too dry, place a humidity pack in your storage container and wait a few hours before grinding. If it feels damp, spread it on a clean surface for five to ten minutes to let surface moisture escape first.
Match your grind to your pipe material
Different pipe materials respond differently to the same grind. Metal pipes run hotter, so a slightly coarser grind slows the burn and cuts down on harshness at the mouthpiece. Glass pipes preserve flavor best with a true medium grind that burns at a lower, steadier temperature. Wood pipes work well with that same medium grind but benefit from a marginally looser pack to compensate for the material's natural heat insulation.
Step 2. Load the bowl with press and twist
The press-and-twist method is the most reliable way to load a one-hitter, and it's exactly how the dugout system was designed to work. Learning how to pack a one hitter pipe this way removes guesswork and gives you a consistently tight, functional pack every time you load up. Press too hard and you seal the airflow. Too little pressure and the material sits loose, falls out when you tilt the pipe, and burns unevenly from the first draw.
The twist-and-press method explained
Place your ground herb into the dugout chamber or onto a flat, clean loading surface if you're loading by hand. Position the bowl opening of your one-hitter directly over the pile, then push straight down while rotating the pipe about a half-turn in each direction. The twisting motion breaks up any clumps and compresses the material evenly across the entire bowl opening rather than jamming it in from one angle.
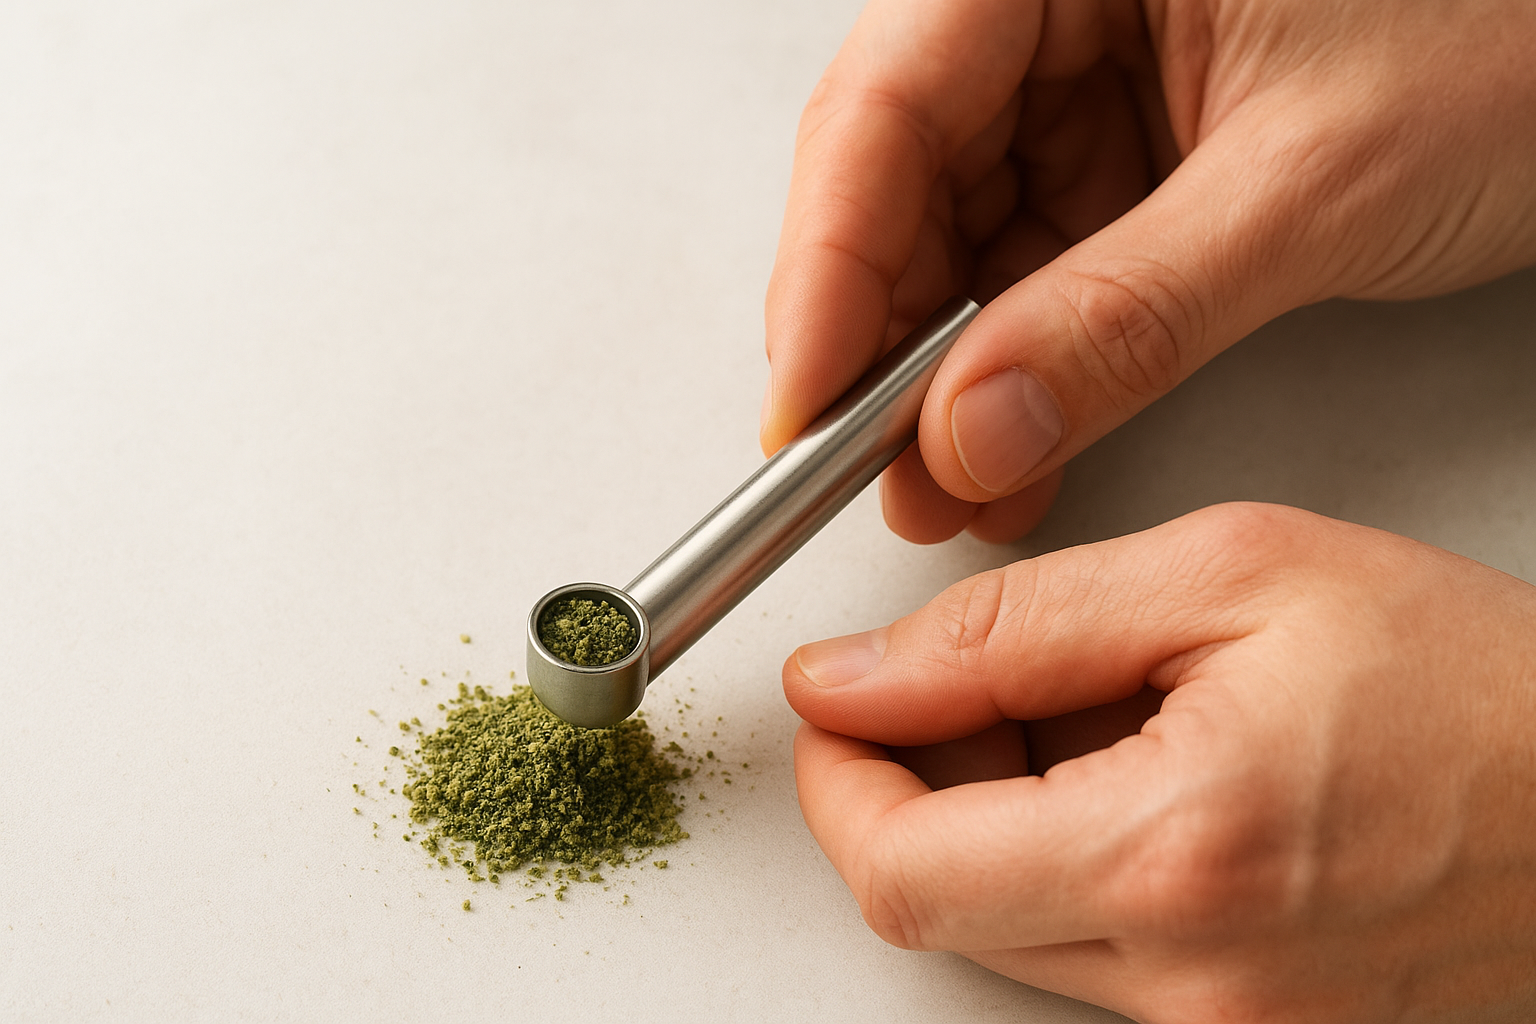
Here's the full loading sequence step by step:
- Fill your dugout compartment or loading tray with a fresh medium grind.
- Hold the one-hitter between your thumb and forefinger with the bowl facing down.
- Press the bowl firmly into the herb pile with steady, even downward pressure.
- Rotate the pipe a quarter-turn left, then a quarter-turn right, while maintaining pressure.
- Lift the pipe and tap the side lightly once to settle the material.
- Inspect the bowl opening - the herb should sit flush or just slightly domed, not sunken or piled high above the rim.
One loading press is usually enough. If the bowl looks underfilled after the first press, repeat the twist once more rather than pushing harder on the existing pack.
How much material to load
A properly loaded one-hitter bowl should hold between 0.1 and 0.15 grams, which fills the chamber without overloading it. You can eyeball this by checking that the herb sits level with the bowl rim after pressing. Material that rises above the rim will crumble off during handling and waste your grind before you even light up.
Your goal is a pack that holds together when you turn the pipe upside down but still allows air to pass through with moderate resistance. If the bowl holds its shape after a gentle tap, you packed it correctly.
Step 3. Check airflow before you light
Before you bring a flame anywhere near the bowl, take a dry draw through the mouthpiece. Inhale gently without lighting and pay attention to the resistance you feel. This single step tells you everything about whether your pack will perform or fail, and it costs you nothing to do. A bowl that passes the draw test delivers a smooth, satisfying hit the first time. One that fails gives you a clogged tube and wasted material.
Read the resistance level
The dry draw should feel like pulling air through a slightly narrow straw. Moderate resistance means the material is packed correctly, with enough density to hold together but enough air space to let the smoke travel through cleanly. If the draw feels completely open with zero resistance, the pack is too loose. The herb will burn too fast, produce thin smoke, and likely fall out when you tilt the pipe. If you can't pull any air through at all, the bowl is over-packed and needs to be loosened before you light it.
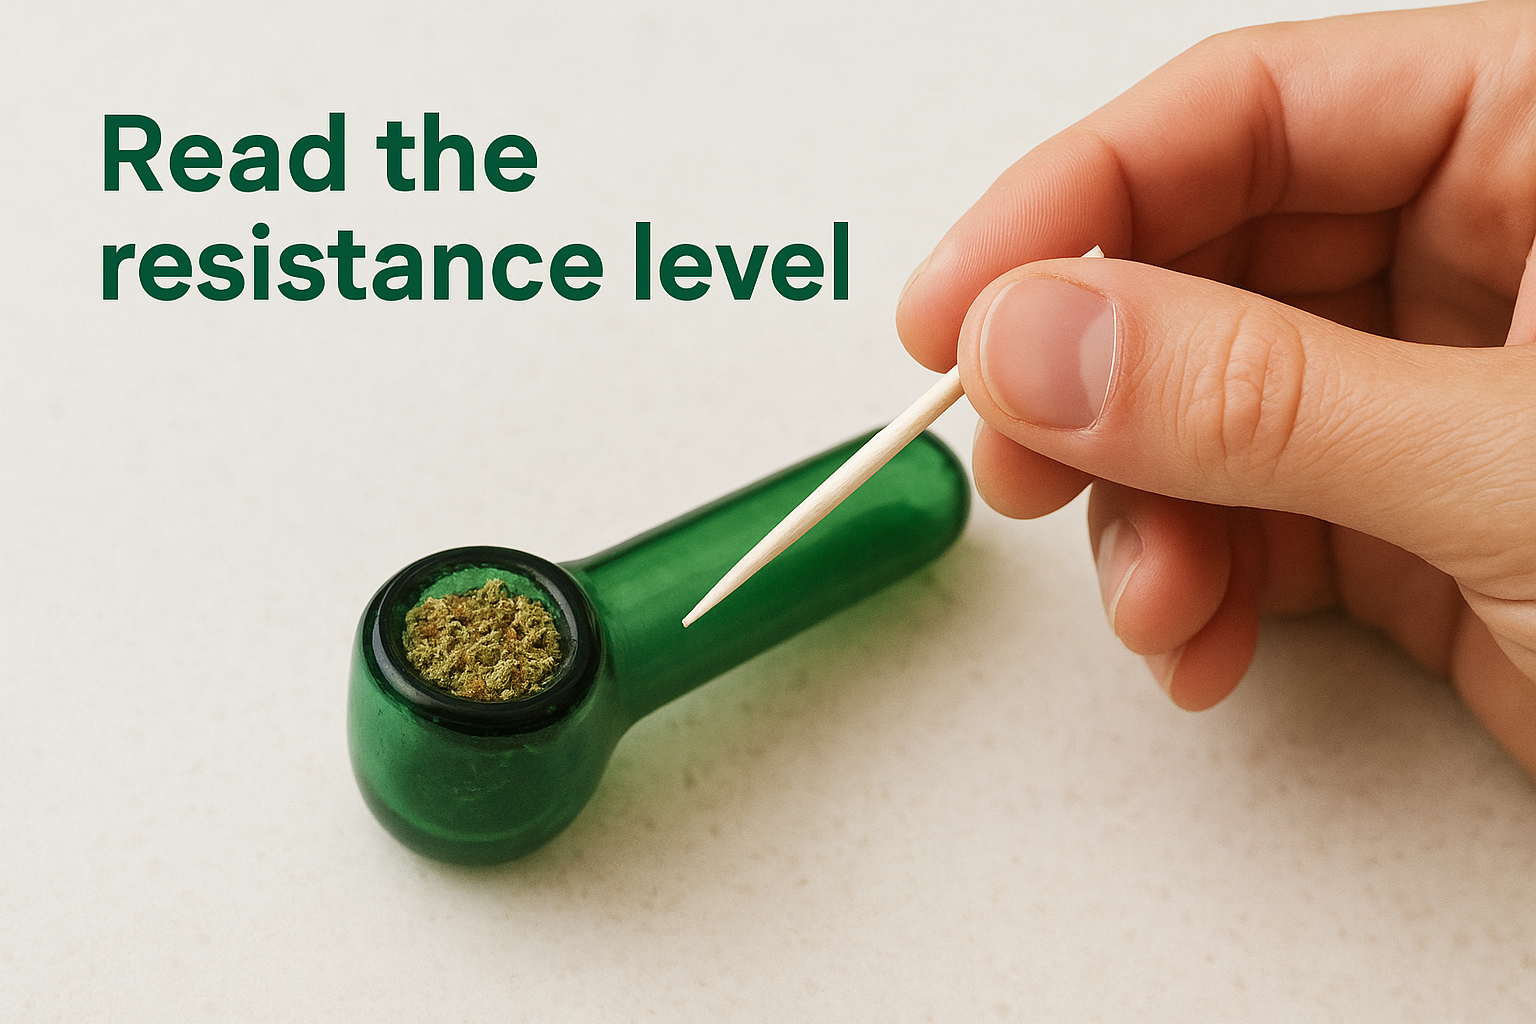
A quick dry draw takes two seconds and prevents you from torching a bowl that was never going to draw properly in the first place.
Here is a simple reference for what each resistance level means and what to do about it:
| Resistance Level | What It Means | Fix |
|---|---|---|
| No resistance | Pack too loose | Re-press and twist once more |
| Slight resistance | Slightly loose but workable | Add a small amount of material |
| Moderate resistance | Correctly packed | Light it |
| Heavy resistance | Over-packed | Use a toothpick to loosen the center |
| No airflow at all | Fully blocked | Empty the bowl and reload |
Fix a bad pack before lighting
Knowing how to pack a one hitter pipe also means knowing how to correct a problem before it becomes a wasted hit. If your dry draw reveals a blocked bowl, insert a toothpick or thin poker tool into the center of the packed material and gently rotate it to open up a small channel. You don't need to remove everything and start over. A small central channel restored with a toothpick is usually enough to bring the resistance back into the moderate range and make the bowl fully functional without any additional material.
Step 4. Light and inhale for a smoother hit
You've verified your airflow, so now it's time to light up. How you apply the flame and how you inhale determines whether you get a smooth, full hit or a harsh, scorched draw. Most people rush this step and torch the entire bowl surface at once, which burns the outer layer of material instantly while leaving the center untouched. A controlled flame and a slow, steady pull deliver far more consistent results than a fast, careless light.
Position the flame at the edge, not the center
Hold your lighter at a slight angle so the flame touches just one edge of the bowl, not the middle. This technique, sometimes called corner lighting, lets you ignite a smaller portion of the material on the first pull. The heat travels inward naturally as you draw, so you don't need to torch the whole surface upfront. One side-entry flame produces a slower, more even burn across the packed chamber.
Touching the flame directly to the center of a one-hitter bowl burns the top layer instantly and wastes a portion of your pack before you've drawn a single breath.
Pull the lighter away as soon as you see the material catch. One to two seconds of direct flame contact is all you need. If you hold the flame in place while inhaling, you overheat the bowl, scorch the herb, and pull combustion gases through the tube that make the hit harsher than it needs to be.
Inhale slowly to control the draw
Once the material is lit, draw with slow, steady breath pressure rather than pulling hard all at once. A slow inhale keeps the burn temperature lower, reduces harshness at the mouthpiece, and lets you pull the full hit cleanly before the bowl cashes. If you're practicing how to pack a one hitter pipe for the first time, a three-second inhale is a reliable baseline. Pull for three seconds, pause briefly, then exhale.
Your lips should form a firm seal around the mouthpiece without gripping it too tightly. A loose seal pulls in extra air from the sides, dilutes the smoke, and weakens the hit. A firm seal directs all airflow through the packed chamber and gives you complete control over the draw from start to finish.
Step 5. Cash it and clean it to avoid clogs
Once your hit is finished, the material in the bowl should look gray or white rather than green or brown. That color shift tells you the chamber is cashed and ready to clear. Tap the bowl opening firmly against the edge of a clean surface or an ashtray to knock the ash loose. Most spent material drops out cleanly after one or two firm taps if your original pack had the right consistency.
Recognize when the bowl is fully spent
A cashed bowl produces a thin, ashy draw with very little flavor or visible smoke. If you draw and taste mostly char or feel no resistance at all, the material has burned through completely and the bowl needs clearing. Don't try to relight a cashed one-hitter expecting more from it. You'll pull ash and fine particles straight through the tube, coat the inside with resin faster than normal, and make your next clean pack taste stale from the residue left behind.
Clearing a cashed bowl immediately after each use keeps ash from mixing with fresh material during your next load, which is one of the most common causes of poor flavor and blocked airflow.
Clean the tube on a regular schedule
Resin builds up inside the tube whether or not you notice it right away. A pipe cleaned every three to five sessions performs consistently longer than one cleaned only when it clogs completely. The quickest cleaning method requires nothing more than a few supplies you likely already have.
Here's a simple cleaning routine that takes under five minutes:
- Insert a pipe cleaner or cotton swab into the mouthpiece end and push it through to the bowl.
- Twist the cleaner as you push to scrape resin from the tube walls.
- Swap in a fresh cleaner and repeat until it comes out without dark residue.
- For glass or metal pipes with heavy buildup, soak the tube in isopropyl alcohol for ten minutes, then rinse with warm water and let it dry completely before the next use.
Knowing how to pack a one hitter pipe well means you also know how to protect your investment between sessions. A clean tube draws better, preserves flavor, and gives you a reliable baseline every time you load fresh material into the bowl.
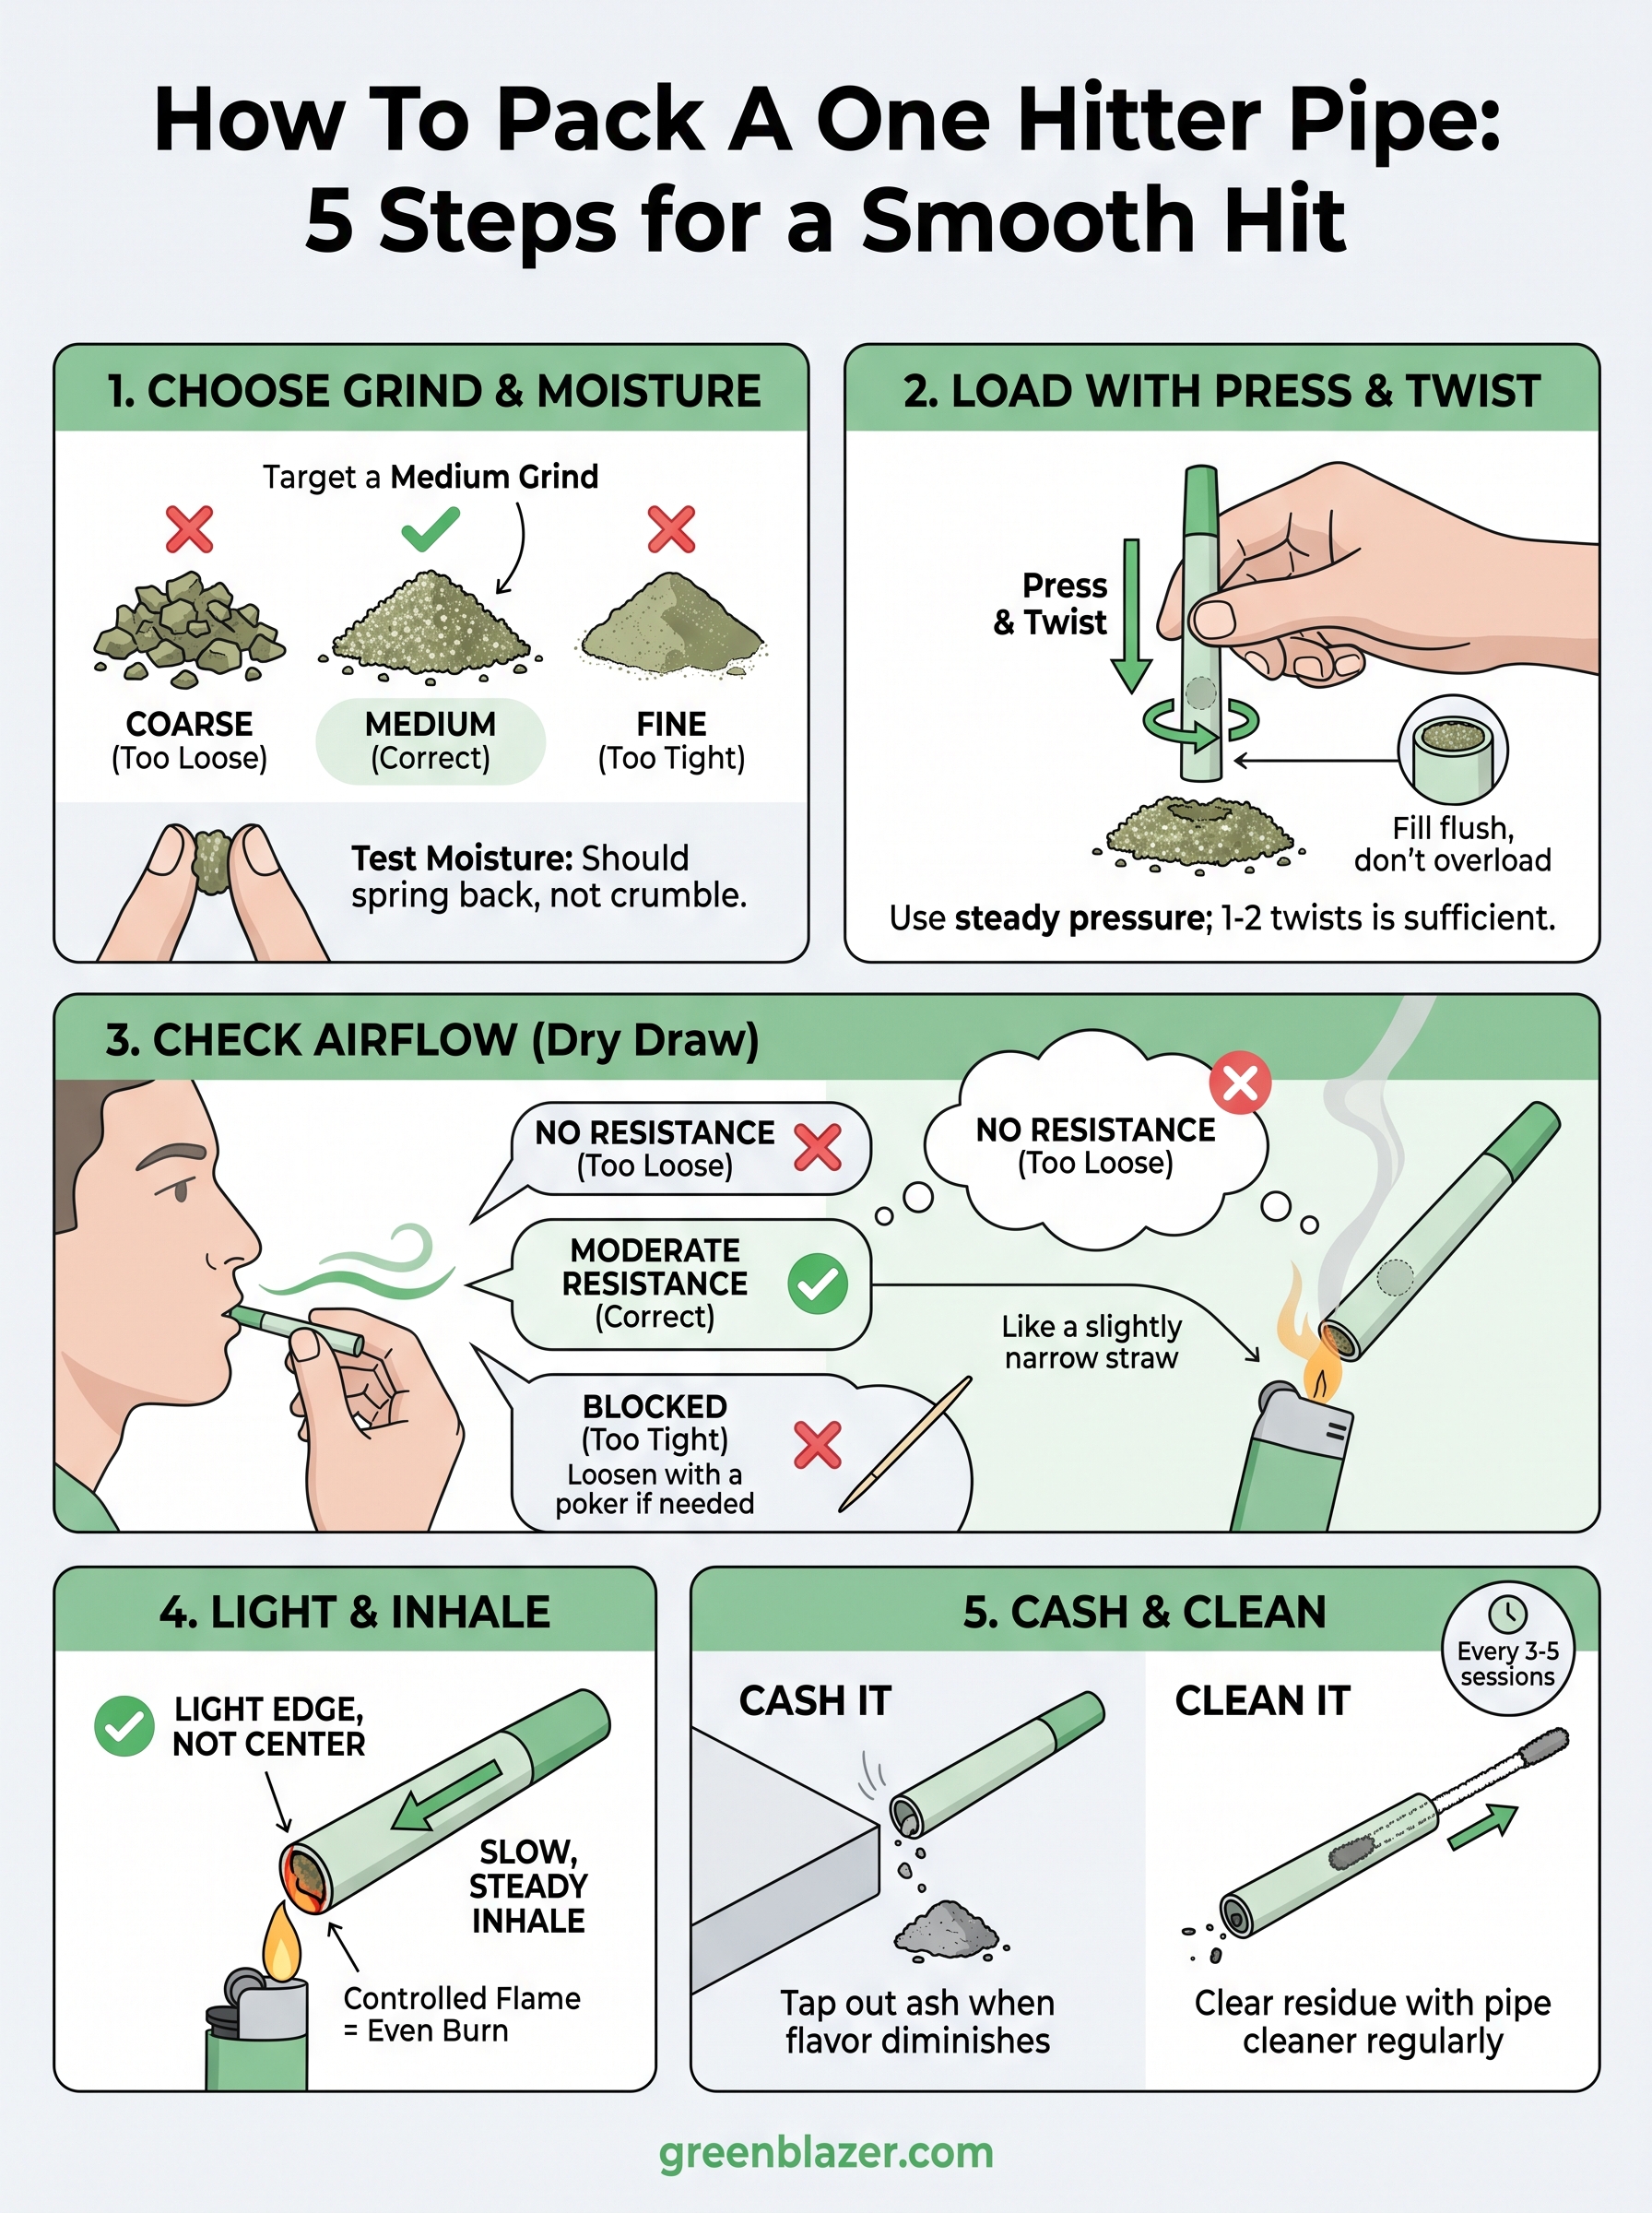
Quick wrap-up
Knowing how to pack a one hitter pipe comes down to five repeatable steps: grind to a medium consistency, load with a press-and-twist, check airflow before lighting, apply your flame to the edge, and clear and clean the bowl after every use. Each step builds on the one before it, so skipping any one of them usually shows up as a clog, a weak hit, or wasted material. The good news is that once these habits click, the whole process takes under a minute.
Your pipe will reward you with cleaner flavor and consistent draws every time you follow this routine. A well-maintained one-hitter is one of the most efficient smoking tools available, and it stays that way when you treat it right. If you want more ways to simplify your sessions, browse the full selection of RAW cones and smoking accessories at Green Blazer and find what works best for you.
